Quantcast
Channel: Recovery – Data Protection Hub
Viewing all 60 articles
Browse latest View live

Counting the numbers

$
0
0

How many datacentres do you have across your organisation?

Server Rooms

It’s a simple enough question, but the answer is sometimes not as simple as some organisations think.

The reason for this is it’s too easy to imagine different physical locations equating to different datacentres.

There are actually two conditions that must be met before a server room can be considered a fully independent datacentre. These are:

  1. Physical separation – The room/building must be sufficiently physically separated from other datacentres. By “sufficiently”, I mean that any disaster situation the company designs into its contingency plans should not be able to take out both more than one datacentre on the basis of physical proximity to one another.
  2. Technical separation – The room/building must be able to operate at its full production potential without the direct availability of any other datacentre within the environment.

So what does it mean if you have a datacentre that doesn’t meet both of those requirements? Quite simply, it’s not an independent datacentre at all, and likely should be considered just a remote server room which is part of a geographically disperse datacentre.

If you’re wondering what the advantage of making this distinction is, it’s this: unless they’re truly independent, considering geographically disperse server rooms to be datacentres results in the business often making highly incorrect assumptions about the resiliency of the IT systems, and by extension, the business itself.

You might think that we have enough differentiation by referring to simply datacentres and independent datacentres. This, I believe, compounds the problem rather than introducing clarity; many people, particularly those who are budget conscious, will assume the best possible scenario for the least possible price. We all do it – that’s why getting a bargain when shopping can be such a thrill. So while-ever a non-independent datacentre is referred to as a datacentre, it’s going to be read by a plethora of people within a business, or the customers of that business, as an independent one. The solution is to take the word away.

So, on that basis, it’s time to recount, and answer: how many datacentres does your business truly have?


Recovery survey

$
0
0

We talk a lot about backups, but we all know that backups are done for one reason – to recover when necessary. To that end, I’d like to get an understanding of how recoveries work in the broader backup community. I’ve already got a good amount of exposure to how my customers tend to run recoveries within their environments, but I’d like to collate, then publish the data as a broader reference point.

To that end, I’d be most grateful if you could complete this short survey.

I’ll keep the survey up and active until 30 September, and publish the results during October.

NOTE: The survey form I use may ask for an email address. All responses are treated as anonymous, and your email address will not be used for any purpose if provided, but if you’d prefer to not supply an email address, feel free to do so.

Restore


The survey has closed. Results will be posted soon. Thanks to everyone for their participation.

Recovery Survey Results

$
0
0

Thanks to everyone who provided responses into the recovery survey. It proved to be a very interesting insight into some of the recovery profiles businesses experience. It confirmed some generally held views about recovery, but it also highlighted some differences. For example, consider the results for recovery frequencies:

Recovery frequencies

The full report, in PDF format, is available from the reports section of the NetWorker Hub.

NetWorker 8: Synthetic fulls

$
0
0

The history of NetWorker and synthetic fulls is an odd one. For years, NetWorker had the concept of a ‘consolidated’ backup level, which in theory was a synthetic full. The story goes that this code came to Legato via a significant European partner, but once it came into the fold, it was never fully maintained. Subsequently, it was used sparingly at best, and not with some small amount of hesitation when it was required.

NetWorker version 8, however, saw a complete rewrite of the synthetic full code from the ground up – hence its renaming from the old ‘consolidate’ to ‘synthetic full’. Architecturally, this is a far more mature version of synthetic full than NetWorker previously had. It’s something that can be trusted, and it’s something which has been scoped from the ground up for expansion and continued development.

If you’re not familiar with the concept of a synthetic full, it’s fairly easy to explain – it’s the notion of generating a new full backup from a previous full and one or more incremental backups, without actually re-running a new full backup. The advantage should be clear – if the time constraints on doing regular or semi-regular full backups the traditional way (i.e., walking, reading and transmitting the entire contents of a filesystem) is too prohibitive, then synthetic full backups allow you to keep regenerating a new full backup without that incurring that cost. The two primary scenarios where this might happen are:

  • Where the saveset in question is too large;
  • Where the saveset in question is too remote.

In the first case, we’d call it a local-bandwidth problem, in the second, a remote-bandwidth problem. Either way, it comes down to bandwidth.

Synthetic fulls aren’t a universal panacea; for the time being they’re designed to work with filesystem savesets only; VMware images, databases, etc., aren’t yet compatible with synthetic fulls. (Indeed, the administration manual states all the “won’t-work-fors” then ends with “Backup command with save is not used”, which probably sums it up most accurately.)

For the time being, synthetic fulls are also primarily suited to non-deduplicating devices, and either physical or virtual tape; there’s no intelligence as yet in the process of generating the new full backup when the backups have been written to true-disk style devices (AFTDs or Boost); that being said, there’s nothing preventing you from using synthetic full backups in such situations, you’ll just be doing it in a non-optimal way. Of course, the biggest caveat for using synthetic full backups with physical or virtual tape is each unit of media only supports 1 read operation or 1 write operation; a lack of concurrency may cause the process to take considerably longer than normal Therefore, a highly likely way in which to use synthetic full backups might be reading from advanced file type devices or DD Boost devices, and writing out to physical or virtual tape.

The old ‘consolidate’ level has been completely dropped in NetWorker 8; instead, we now have two new levels introduced into the equation:

  • synth_full – Runs a synthetic full backup operation, merging the most recent full and any subsequent backups into a new, full backup.
  • incr_synth_full – Runs a new incremental backup, then immediately generates a synthetic full backup as per the above; this captures the most up-to-date full of the saveset.

This means the generation of a synthetic full can happen in one of two ways – as an operation completely independent of any new backup, or mixed in with a new backup. There’s advantages to this technique – it means you can separate off the generation of a synthetic full from the regular backup operations, moving that generation into a time outside of normal backup operations. (E.g., during the middle of the day.)

Indeed, while we’re on that topic, there’s a few recommendations around the operational aspect of synthetic full backups that it’s worth quickly touching on (these are elaborated upon in more detail in the v8 Administration guide):

  • Do not mix Windows and Unix backups in the same group when synthetic fulls are generated.
  • Do not run more than 20 synthetic full backup mergers at any one time.
  • The generation of a synthetic full backup requires two units of parallelism – be aware of this when determining system load.
  • Turn “backup renamed directories” on for any client which will get synthetic full backups.
  • Ensure that if saveset(s) to receive synthetic fulls are specified manually, they have a consistent case used for them, and all Windows drive letters are specified in upper-case.
  • Don’t mix clients in a group that do synthetic full backups with others that don’t.

As you may imagine from the above rules, a simple rule of thumb is to only use synthetic full backups when you have to. Don’t just go turning on synthetic fulls for every filesystem on every client in your environment.

A couple of extra options have appeared in the advanced properties of the NSR group resource to assist with synthetic full backups. (Group -> Advanced -> Options). These are:

  • Verify synthetic full – enables advanced verification of the client index entries associated with the synthetic full at the completion of the operation.
  • Revert to full when synthetic fails – allows a group to automatically run a standard full backup in the event of a synthetic full backup failing.

For any group in which you perform synthetic fulls, you should definitely enable the first option; depending on bandwidth requirements, etc., you may choose not to enable the second option, but you’ll need to be careful to subsequently closely monitor the generation of synthetic full backups and manually intervene should a failure occur.

Interestingly, the administration manual for NetWorker 8 states that another use of the “incr_synth_full” level is to force the repair of a synthetic full backup in a situation where an intervening incremental backup was faulty (i.e., it failed to read during the creation of the synthetic full) or when an intervening incremental backup did not have “backup renamed directories” enabled for the client. In such scenarios, you can manually run an incr_synth_full level backup for the group.

Following is an annotated example of using synthetic full backups:

Synthetic Full Backups, Part 1

In the above, I’ve picked a filesystem called ‘/synth’ on the client ‘test01′ to backup to. Within the filesystem, I’ve generated 10 data files for the first, full backup, then listed the content of the backup at the end of it.

Synthetic full backups, part 2

In the above, I generated a bunch of new datafiles in the /synth filesystem before running an incremental backup, naming them appropriately. I then listed the contents of the backup, again.

Finally, I generated a new set of datafiles in the /synth filesystem and ran an incr_synth_full backup; the resulting backup incorporated all the files from the full backup, plus all the files from the incremental backup, plus all the new files:

Synthetic full backups, part 3

Overall, the process is fairly straight forward, and fairly easy to run. As long as you follow the caveats associated with synthetic full backups, and use them accordingly, you should be able to integrate them into your backup regime without too much fuss.

One more thing…

There’s just one more thing to say about synthetic full backups, and this applies to any product where you use them, not just NetWorker.

While it’s undoubtedly the case that in the right scenarios, synthetic full backups are an excellent tool to have in your data protection arsenal, you must make sure you don’t let them blind you to the real reason you’re doing backups – to recover.

If you want to do synthetic full backups because of a local-bandwidth problem (the saveset is too big to regularly perform a full backup), then you have to ask yourself this: “Even if I do regularly have a new full backup without running one, do I have the time required to do a full recovery in normal circumstances?”

If you want to do synthetic full backups because of a remote-bandwidth problem (the saveset too large to comfortably backup over a WAN link), then you have to ask yourself this: “If my link is primarily sized for incremental backups, how will I get a full recovery back across it?”

The answer to either question is unlikely to be straight forward, and it again highlights the fact that data backup and recovery designs must fit into an overall Information Lifecycle Protection framework, since it’s quite simply the case that the best and most comprehensive backup in the world won’t help you if you can’t recover it fast enough. To understand more on that topic, check out “Information Lifecycle Protection Policies vs Backup Policies” over on my Enterprise Systems Backup blog.

The divisibility of eggs

$
0
0

The caution about keeping all of ones eggs in the one basket is a fairly common one.

It’s also a fairly sensible one; after all, eggs are fragile things and putting all of them into a single basket without protection is not necessarily a good thing.

Yet, there’s an area of backup where many smaller companies easily forget the lesson of eggs-in-baskets, and that area is deduplication.

The mistake made is assuming there’s no need for replication. After all, no matter what the deduplication system, there’s RAID protection, right? Looking just at EMC, with either Avamar or Data Domain, you can’t deploy the systems without RAID*.

As we all know, RAID doesn’t protect you from accidental deletion of data – in mirrored terms, deleting a file from one side of the mirror doesn’t even commit the operation until it’s been completed on the other side of the mirror. It’s the same for all other RAID.

Yet deduplication is potentially very much like putting all ones eggs in one basket when comparing to conventional storage of backups. Consider the following scenario in a non-deduplication environment:

Backup without deduplication

In this scenario, imagine you’re doing a full backup once a week of 1.1TB, and incrementals all other days, with each incremental averaging around 0.1TB. So at the end of each week you’ll have backed up 1.7TB. However, cumulatively you keep multiple backups over the retention period, so those backups will add up, week after week, until after just 3 weeks you’re storing 5.1TB of backup.

Now, again keeping the model, imagine a similar scenario but with deduplication involved (and not accounting for any deduplication occurring within any individual backup):

Backup with deduplication


Now, again, I’m keeping things really simple and not necessarily corresponding to a real-world model. However, while each week may see 1.7TB backed up, cumulatively, week after week, the amount of data stored by the deduplication system will be much lower; 1.7TB at the end of the first week, 2.3TB at the end of the second, 2.9TB at the end of the third.

Cumulatively, where do those savings come from? By not storing extra copies of data. Deduplication is about eliminating redundancy.

On a single system, deduplication is putting all your eggs in one basket. If you accidentally delete a backup (and it gets scrubbed in a housekeeping operation), or if the entire unit fails, it’s like dropping the basket. It’s not just one backup you lose, but all backups that referred to the specific data lost. It’s something that you’ve got to be much more careful about. Don’t treat RAID as a blank cheque.

The solution?

It’s trivially simple, and it’s something every vendor and system integrator worth their salt will tell you: when you’re deduplicating, you must replicate (or clone, in a worse case scenario), so you’re protected. You’ve got to start storing those twin eggs in another basket.

Cloning of course is important in non-deduplicated backups, but if you’ve come from a non-deduplicated backup world, you’re used to having at least a patchy safety net involved – with multiple copies of most data generated, even in an uncloned situation if a recovery from week 2 fails, you might be able to go back to the week 3 backup and recover what you need, or at least enough to save the day.

The message is simple:

Deduplication = Replication

If you’re not replicating or otherwise similarly protecting your deduplication environment, you’re doing it wrong. You’ve put your eggs all in one basket, and forgotten that you can’t unbreak an egg.


Well, technically, you could probably sneak in an AVE deployment without RAID, but you’d be getting fairly desperate.


Windows block based backup with Linux AFTDs

$
0
0

One of the new features of NetWorker 8.2 is the expansion of Windows Block Based Backups (BBB) to support additional backup targets. When the feature was originally introduced into NetWorker 8.1, it supported only the following devices:

  • Data Domain Boost, and
  • Advanced File Type Devices (AFTDs) on Windows systems only.

However, there’s a lot of environments out there that can’t necessarily position a Windows storage node for such backups if Boost isn’t available, and so the logical extension to the solution was to support backing up to AFTDs on Unix and Linux systems, too.

That’s what has been added in 8.2. If you’re using Data Domain, you’ll almost certainly want to do these backups to Data Domain Boost devices, of course. However, if you don’t have Data Domain, then the option of backing up to any AFTD makes Windows BBB much more attractive.

The setup is surprisingly straight forward, but you will need to install and configure Samba on your Linux or Unix host in order to be able to present the AFTD as a CIFS share to the Windows host.

On my Linux lab server, I have several AFTDs – 2 x 150GB devices and 2 x 50GB devices. For the purposes of the setup, I decided to configure the 2 larger AFTDs for CIFS based BBB backups for a Windows 2012 host. The Samba configuration looks like the following:

Samba Device Configuration

That provides two Samba shares, one per device. The device at path /d/03 is shared as d_03, and the device at path /d/04 is shared as d_04.

To enable successful sharing, I used smbpasswd to first add, then enable the root user:

# smbpasswd -a root

Followed by:

# smbpasswd -e root

(I picked a reasonably secure password for the root user for Samba which was unrelated to the actual root user account.)

Next, it becomes necessary to edit the device access information for each device:

Device list

You’ll need to pick the devices out of the device list that match the paths you’ve configured for Samba access – in my case, they’re the devices ‘BIG-01′ and ‘BIG-02′. Editing the device properties for BIG-01:

Device access information

In all cases, make sure the owner storage node’s path is listed first in the device access information. In this case, that’s /d/03 for the Linux server itself. The CIFS path to the device is listed for Windows access. Note that using a drive mapping isn’t recommended (and in fact is usually quite painful to configure). So in this case, the CIFS share for /d/03 iis \\tara\d_03, and is listed second.

In addition to specifying the device access information, it’s important you specify the remote username and password that the NetWorker client software will use when accessing the CIFS share from the client. That’s done in the Configuration tab:

Remote user and password for the devices

With those settings in place, it’s time for the client configuration. This is actually very straight forward:

Enabling BBB on a client

In actual fact, it’s just a simple case of checking the Block Based Backup checkbox on the main configuration tab of the client. Well, almost. This is a lab environment so that’s all I had to do. There are some considerations in a production environment for BBB, however. For instance, the C:\ drive on a Windows system can get block based backups, but incremental backups will fail – the system is designed, after all, to be used on larger filesystems in specific scenarios (e.g., highly dense filesystems) rather than for every filesystem.

Once the backup has been kicked off, you’ll get reasonably good performance since you’re not working with the client filesystem. For example, even in my lab environment:

BBB Save

Once completed, the BBB save looks reasonably similar to a standard backup, viz:

BBB Savegroup Results

You’ll note one key exception of course – the BBB is reported as having a file count of 1, since it didn’t actually traverse the filesystem.

Recovery is a very straight-forward process via the NMC Recovery interface. First, select the client you’ll be recovering from, and having done so, choose the option to do a recovery from a Block Based Backup:

BBB Recovery Step 1

Clicking Next will allow you to select what you want to recover: file level, or image level. If file level, you can choose which files you want to recover from:

BBB Recovery Step 2

Having selected the data to recover, going to the Recovery Options allows you to choose to recover the data in place, or to a new directory:

BBB Recovery, Step 3

Next, you get to confirm what you’ll be doing and decide when the recovery will be run:

BBB Recovery, Step 4

Once you’ve named the recovery, you can click the “Run Recover” button (not shown above) to initiate the recovery. The results should be similar to the following:

BBB Recovery, Step 5

At the completion of the recovery, you can check the client to confirm the files have come back, but that’s about all there is to it.


Backing up renamed directories

$
0
0

Long-term NetWorker administrators may remember that NetWorker used to have a somewhat odd mechanism of dealing with renamed directories. Nowadays the default option for any new client is to enable backup renamed directories, and this is a good thing, even though it might end up using a bit more backup media.

To explain the difference between then and now, and why the new default is so much better, I first have to setup a scenario.

Consider a client that has a directory called /renaming/backup, and underneath that directory there’s another directory called /renaming/backup/alpha. The named saveset for this client will be /renaming/backup, which will capture all subdirectories.

In our scenario, there will first be a full backup of /renaming/backup, then the alpha directory will be renamed to beta, and a new backup taken.

Temporarily reinstating the old mechanism by turning off “backup renamed directories” for this client, there’s a considerable difference between the full backup done with a /renaming/backup/alpha subdirectory and the subsequent incremental with alpha renamed to beta. First, the full:

Backup Renamed Directories Off, Full Backup

After that backup was taken, I renamed the alpha directory to beta and re-ran the backup. Here’s what the savegroup completion looked like:

Backup renamed directories off, incremental backup after directory rename

You’ll note there that the size of the incremental backup of /renaming/backup was just 2KB, which would be around consistent with backing up the details associated with a changed directory, but nothing underneath that directory.

And that was sort of the problem with the old method, right there. A recovery following that second backup of /renaming/backup would yield odd results:

[root@centaur backup]# recover
Current working directory is /renaming/backup/
recover> add beta
/renaming/backup/beta
1 file(s) marked for recovery
recover> relocate /renaming/recovery/backup-rename-off
recover> recover
Recovering 1 file from /renaming/backup/ into /renaming/recovery/backup-rename-off
Volumes needed (all on-line):
        centaur.003 at AFTD-01
Total estimated disk space needed for recover is 36 KB.
Requesting 1 file(s), this may take a while...
Recover start time: Mon 20 Oct 2014 19:52:42 AEDT
Requesting 1 recover session(s) from server.
91651:recover: Successfully established AFTD DFA session for recovering save-set ID '4114926770'.
./beta/
Received 1 file(s) from NSR server `centaur'
Recover completion time: Mon 20 Oct 2014 19:52:42 AEDT
recover> 

[root@centaur backup]# cd ..
[root@centaur renaming]# ls
backup  recovery
[root@centaur renaming]# cd recovery
[root@centaur recovery]# ls
backup-rename-off
[root@centaur recovery]# cd backup-rename-off/
[root@centaur backup-rename-off]# ls
beta
[root@centaur backup-rename-off]# cd beta
[root@centaur beta]# ls
<crickets chirping>

To recover the contents of the beta directory, one had to instead switch to a browse time before the rename happened, and recover the old directory name. As you might imagine, this required rather intimate knowledge for the recovery operator of when directories had been renamed.

Jumping forward to now, we have a much more agreeable mechanism. After a delete of all the backups for the client, the backup process takes up a bit more space, but results in a simpler, more reliable recovery. First, I renamed /renaming/backup/beta back to /renaming/backup/alpha. Then, the full backup:

Full backup with backup renamed directories on

After that backup completed, I renamed /renaming/backup/alpha to /renaming/backup/beta and re-ran the backup – again, as an incremental:

Backup renamed directories on, incr backup after renaming a directory

You’ll notice in this scenario the incremental is as big as the previous full, since the alpha (or beta) directory is the only subdirectory of /renaming/backup.

However, that little hit on the backup space is more than made up for by a simplified recovery process. Executing a recovery after the second backup completes yields the following results:

[root@centaur backup]# recover
Current working directory is /renaming/backup/
recover> ls
 beta
recover> add beta
11 file(s) marked for recovery
recover> relocate /renaming/recovery/backup-renamed-on
recover> recover
Recovering 11 files within /renaming/backup/ into /renaming/recovery/backup-renamed-on
Volumes needed (all on-line):
        centaur.003 at AFTD-01
Total estimated disk space needed for recover is 1047 MB.
Requesting 11 file(s), this may take a while...
Recover start time: Mon 20 Oct 2014 20:03:29 AEDT
Requesting 1 recover session(s) from server.
91651:recover: Successfully established AFTD DFA session for recovering save-set ID '4014264195'.
./beta/file-2MB.dat
./beta/file-32MB.dat
./beta/file-1MB.dat
./beta/file-512MB.dat
./beta/file-128MB.dat
./beta/file-4MB.dat
./beta/file-16MB.dat
./beta/file-8MB.dat
./beta/file-256MB.dat
./beta/file-64MB.dat
./beta/
Received 11 file(s) from NSR server `centaur'
Recover completion time: Mon 20 Oct 2014 20:03:36 AEDT

If the version of NetWorker you’re using was setup more recently, it’s more than likely clients you’ve created have backup renamed directories already turned on. If you’re working with an older version of NetWorker, or a NetWorker server that has been in use since version 7.4 or older, it’s possible legacy clients still have the option turned off.

I heartily recommend all filesystem clients always have backup renamed directories enabled.

A locale problem

$
0
0

I had a doozy of a problem a short while ago – NetWorker 8.2 in a big environment, and every now and then the NMC Recovery interface would behave oddly. By oddly:

  • Forward/Back buttons might stop working when choosing between specific backups in the file browser
  • Manually entering a date/time might jump you to a different date/time
  • Backups that were executed extremely closely to each other (e.g., <15 minutes apart) might take a while to show up in NMC

Oddly enough, it actually looked like a DNS issue in the environment. Windows nslookups could often timeout for 2 x 2 seconds before returning successfully, and just occasionally the gstd.raw log file on the NMC server would report name resolution oddities. This seemed borne out by the fact that recoveries executed directly from clients using the old winworkr interface or the CLI would work – with a separate NMC and NetWorker server, the name resolution path between the types of recoveries were guaranteed to be different.


(Just a quick interrupt. The NetWorker Usage Survey is happening again. Every year I ask readers to participate and tell me a bit about their environment. It’s short – I promise! – you only need around 5 minutes to answer the questions. When you’re finished reading this article, I’d really appreciate if you could jump over and do the survey.) 


But it was an interesting one. Over the years I’ve seen a few oddities in the way NMC behaves, and I wasn’t inclined to completely let NMC off the hook. So while we were digging down on the DNS scenarios, I was also talking to the support and eventually engineering teams about it from an NMC perspective.

It turned out to be a locale problem. A very locale problem. It also eventually made sense why I couldn’t reproduce it in a lab. You see, I’m a bit of a lazy Windows system builder – I do the install, patch it and then get down to work. I certainly don’t do customisation of the languages on the systems or anything like that.

But the friendly engineer assigned to the case did do just that, and it became obvious that the problems were only reproducible when the the regional display formats on a Windows host were set to either “English (Australian)” or “English (New Zeaaland)”.

By Windows host, I mean the machine that the NMC Java application was being run on – not the NMC server, not the NetWorker server, but the NMC client.

So, the following would allow NMC to behave oddly:

english-AU

But, with the following setting, the NMC recovery interface would purr like a kitten:

english-US

It’s certainly something worth keeping in mind if you’re using the recovery interface in NMC a lot – if something looks like it’s not quite right, flick your regional formats setting across to “English (United States)” and see whether that makes a big difference.


(Hey, now you’ve finished reading this article, just a friendly reminder: The NetWorker Usage Survey is happening again. Every year I ask readers to participate and tell me a bit about their environment. It’s short – I promise! – you only need around 5 minutes to answer the questions. When you’re finished reading this article, I’d really appreciate if you could jump over and do the survey.)


NetWorker 8.2 and VBA Instant-Access

$
0
0

One of the great new features in NetWorker is the integration of Instant Access, whereby virtual machines backed up with the VBA appliance to Data Domain systems may be instantly accessed from the Data Domain without needing to actually recover them. This allows you to quickly startup a failed service even as you’re migrating the virtual machine to a production datastore, or pull one or two essential files out of the virtual machine without needing to resort to a file level recovery.

To see this in action, I configured a lab virtual machine for backups then did an Instant Access operation on it.

instant-access-01

In the above screen shot, I picked a VM that hadn’t been used for VBA backups previously, test03, and added it to the Data Domain backup policy, DDBackup. I was then able to run the policy to get a brand new backup of the VM:

instant-access-02

Of course, because the virtual machine was a plain CentOS Linux install, much like other Linux VMs that had been backed up, the first full backup was still remarkably quick. Once that was completed, the bulk of the work shifted across to the vSphere Web Client:

instant-access-03

You’ll need to follow your standard enterprise operational practices for logon, obviously. In this case being a lab server I’m using the virtual vCenter Appliance, and I logged on as the root user. Next stop, the EBR plugin:

instant-access-04

Once logged in, go to Restore and drill down to the virtual machine backup instance you want to recover:

instant-access-05

With the virtual machine backup instance selected, if the backup target was a Data Domain running the right DDOS (5.4 or higher), you’ll be able to initiate the Instant Access option:

instant-access-06

The Instant Access wizard is pretty straight forward and doesn’t really require much thought, other than what the ‘restored’ virtual machine will be named and where in the cluster it’ll be made available:

instant-access-07

Having nominated the name and location you can continue onto final confirmation of the operation:

instant-access-08

When ready, you can complete Finish and before you know it, you’ll see this:

instant-access-09

Now, here’s the kicker. By the time you’ve clicked OK and switched back to say, the vSphere Windows client, your VM will likely be waiting for you:

instant-access-10

There it is in the ‘Test Clients’ pool. It really takes almost no time at all: Instant access is not a lie. You can see the temporary datastore that the VBA appliance has provided for the recovery if you go up to your storage resources, too:

instant-access-11

In this case, because the virtual machine I ‘restored’ wasn’t running any services that publish their presence, it was safe to run both virtual machines at the same time, since the ‘restored’ virtual machine gets reconfigured to use DHCP, thus getting a different IP address to the original:

instant-access-12

In the above, the top console is for the original virtual machine, and the bottom console is for the one made available via Instant Access.

At this point, you’ve got a couple of options – you can either pull out the files you want from the virtual machine using normal operating system access techniques, or you can keep the virtual machine running and migrate it to a production datastore. The migration works in the same way as any normal VMware migration runs, so for this case I just powered down the virtual machine and removed it from Inventory:

instant-access-13

Once you’ve done that, your only other task is to drop the temporary datastore so that VBA cleans up after itself. I’ve found the simplest way to do this is to switch back to the Web GUI and go to do another instant restore of the same virtual machine. This will trigger the following prompt:

instant-access-14

At that point, you can just hit Unmount, then subsequently cancel the operation.

And there you have it – Instant Access. It really is that quick and simple.


Hey, now you’ve finished this article, would you mind quickly filling in the NetWorker Usage Survey if you haven’t already done so? It’ll only take 5 minutes of your time. You can get to the survey here.


Testing (and debugging) an emergency restore

$
0
0

A few days ago I had some spare time up my sleeve, and I decided to test out the Emergency Restore function in NetWorker VBA/EBR. After all, you never want to test out emergency recovery procedures for the first time in an emergency, so I wanted to be prepared.

If you’ve not seen it, the Emergency Restore panel is accessed from your EBR appliance (https://applianceName:8580/ebr-configure) and looks like the following:

EBR Emergency Restore Panel

The goal of the Emergency Restore function is simple: you have a virtual machine you urgently need to restore, but the vCenter server is also down. Of course, in an ideal scenario, you should never need to use the Emergency Restore function, but ideal and reality don’t always converge with 100% overlap.

In this scenario, to simulate my vCenter server being down, I went into vCenter, selected the ESX server I wanted to recover a virtual machine for (c64), and disconnected from it. To all intents and purposes to the ESX server, vCenter was down – at least, enough to satisfy VBA that I really needed to use the Emergency Restore function.

Once you’ve selected the VM, and the backup of the VM you want to restore, you click the Restore button to get things underway. The first prompt looks like the following:

EBR ESX Connection Prompt(Yes, my ESX server is named after the Commodore 64. For what it’s worth, my vCenter server is c128 and a smaller ESX server I’ve got configured is plus4.)

Entering the ESX server details and login credentials, you click OK to jump through to the recovery options (including the name of the new virtual machine):

EBR - Recovery OptionsAfter you fill in the new virtual machine name and choose the datastore you want to recover from, it’s as simple as clicking Restore and the ball is rolling. Except…

EBR Emergency Restore Error

After about 5 minutes, it failed, and the error I got was:

Restore failed.

Server could not create a restore task at this time. Please ensure your ESX host is resolvable by your DNS server. In addition, as configuration changes may take a few minutes to become effective, please try again at a later time.

From a cursory inspection, I couldn’t find any reference to the error on the support website, so I initially thought I must have done something wrong. Having re-read the Emergency Restore section of the VMware Integration Guide a few times, I was confident I hadn’t missed anything, so I figured the ESX server might have been taking a few minutes to be sufficiently standalone after the disconnection, and gave it a good ten or fifteen minutes before reattempting, but got the same error.

So I went through and did a bit of digging on the actual EBR server itself, diving into the logs there. I eventually re-ran the recovery while tailing the EBR logs, and noticed it attempting to connect to a Data Domain system I knew was down at the time … and had my ahah! moment.

You see I’d previously backed up the virtual machine to one Data Domain, but when I needed to run some other tests, changed my configuration and started backing up the virtual infrastructure to another Data Domain. EBR needed both online to complete the recovery, of course!

Once I had the original Data Domain powered up and running, the Emergency Restore went without a single hitch, and I was pleased to see this little message:

Successful submission of restore job

Before too long I was seeing good progress on the restore:

Emergency Restore Progress

And not long after that, I saw the sort of message you always want to see in an emergency recovery:

EBR Emergency Recovery Complete

There you have it – the Emergency Restore function tested well away from any emergency situation, and a bit of debugging while I was at it.

I’m sure you’ll hope you never need to use the Emergency Restore feature within your virtual environment, but knowing it’s there – and knowing how simple the process is – might help you avoid serious problems in an emergency.


Recovery survey

$
0
0

Back in 2012, I ran a survey to gauge some basic details about recovery practices within organisations. (The report from that survey can be downloaded here.)

Recovery survey

It’s been a few years and it seems worthwhile coming back to that topic and seeing how things have changed within NetWorker environments. I’ve asked mostly the same questions as before, but this time I’ve expanded the survey to ask a few extra questions about what you’re recovering as well.

I’d really appreciate if you can take a few minutes to complete the survey using your best estimates. I’ll be running this survey until 31 August and will publish the results by mid-September.

Please enter the security code:
security code
Security Code (lowercase letters):

Submit

NetWorker 9: The future of backup

$
0
0

Introduction

When NetWorker 8 was released I said at the time it represented the biggest consolidated set of changes to NetWorker in the all the years I’d been working with it. It represented a radical overhaul and established the groundwork for further significant changes with NetWorker 8.1 and NetWorker 8.2.

Into the Future

NetWorker 9 – Leaping Into the Future

NetWorker 9 is not a similarly big set of changes: it’s a bigger set of changes.

There’s a good reason why it’s NetWorker 9. This year we celebrated the 25th birthday of NetWorker, and NetWorker has done an excellent job protecting data in those 25 years, but with the changing datacentre and changing IT environment, it was time for NetWorker to change again.

01 - NW9 Launch Screen

NetWorker 9 NMC Splash Screen
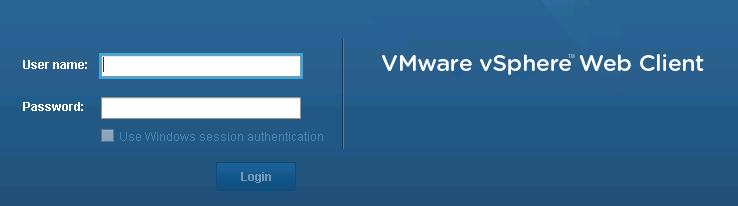
 

Networker 9 NMC Login

NetWorker 9 NMC Login

The changes are more than cosmetic, of course. (Much, much more.) A while ago I posted of the need for an evolved, modern approach to data protection activities, that being the orientation of said policies and processes around service catalogues. This is something I’ve advocated for years, but it was also something I deliberately hinted at with a view towards what was coming with NetWorker 9.

The way in which we’ve configured backups in NetWorker for the last couple of decades has been much the same. When I started using NetWorker in 1996, it was by configuring groups, retention policies, schedules and clients. That’s changing.

A bright new world – Policies

NetWorker 9 represents a move towards a simpler, more containerised approach to configuration, with an emphasis on the service catalogue approach – and here’s what it looks like:

NetWorker 9 Datazone

NetWorker 9 Configuration Engine

The changes in NetWorker 9 are sweeping – classic configuration components such as savegroups, scheduled staging and scheduled cloning are being replaced with a new policy engine that borrows much from the virtual machine protection engine introduced in NetWorker 8.1. This simultaneously makes it easier and faster to maintain data protection configurations, and develop more complex data protection configurations for the modern business. The policy engine is a containerised configuration system that makes it straightforward to identify and modify components of NetWorker configuration, and even have parts of the configuration dynamically adjust as required.

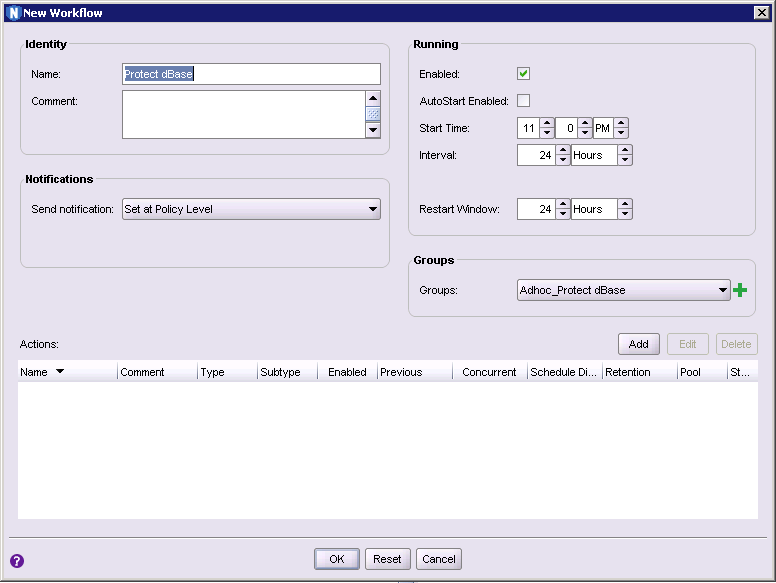
The core configuration process now in NetWorker 9 consists of:

  • A policy, which is a container for workflows
  • One or more workflows, which have:
    • A set of actions and
    • A list of data sources to run those actions against

If you’re upgrading NetWorker from an earlier version, your existing NetWorker configuration will be migrated for you into the new policy engine configuration. I’ll get to that in a little while. Before that though, we need to talk more about the policy engine.

Regardless of whether you’re setting up a brand new NetWorker server or upgrading an existing NetWorker server, you’ll get 5 default policies created for you:

  • Server Protection
  • Bronze
  • Silver
  • Gold
  • Platinum

Each of these policies do distinctly different things. (If you’re migrating, you’ll get some additional policies. More of that in a while.)
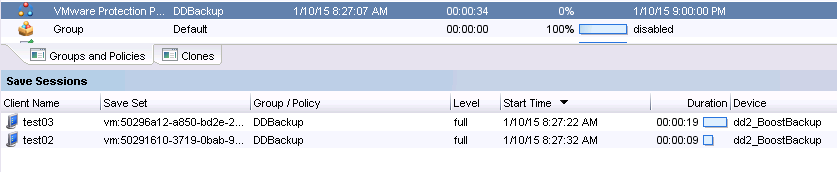
NW9 Protection - Policy with 2 workflows

NetWorker 9 Protection Window

In this case, the server protection policy consists of two workflows:

  • NMC server backup – Performs a backup of the NetWorker management console database
  • Server backup – Performs a bootstrap backup and a media database expiration

You can see straight away that’s two entirely different things being done within the same policy. In the world of NetWorker 8.x and lower, each Group was effectively an atomic component that did only one particular thing. With policies, you’ve got a container that encapsulates multiple logically similar activities. For instance, let’s look at the difference between the default Bronze policy and the default Silver policy:
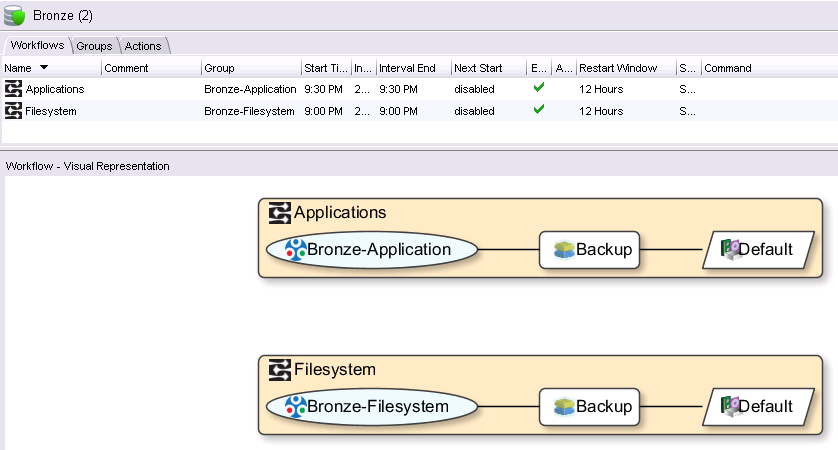
NetWorker 9 Bronze Policy

NetWorker 9 Bronze Policy

The Bronze policy has two workflows – one for Applications, and one for Filesystem backups. Each workflow does a backup to the Default pool (which of course you can can change), and that’s it. By comparison, the Silver policy looks like the following:

NetWorker 9 Silver Policy

NetWorker 9 Silver Policy

You can see the difference immediately – a Silver policy is about backing up, then cloning. The policy engine is geared very much towards a service catalogue design – setup a small number of policies with the required workflows and consolidate your configuration accordingly.

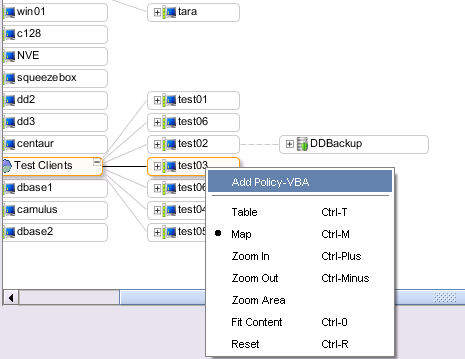
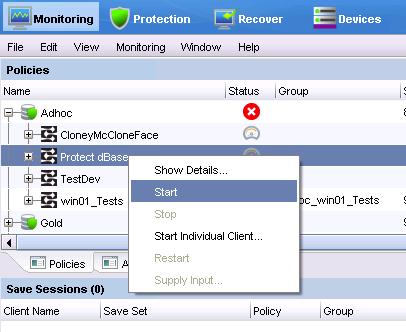
Oh – and here’s a cool thing about the visual policy engine – right clicking within the visualisation of the policy and changing settings, such as:

NetWorker 9 Right Clicking in Visual Policy

NetWorker 9 Right Clicking in Visual Policy

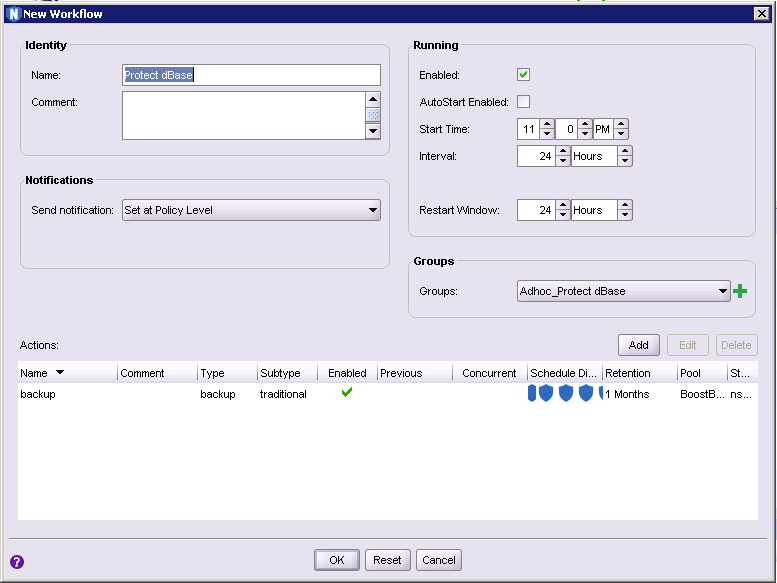
The policy engine is not a like-for-like translation from older versions of NetWorker configuration (though your existing configuration is migrated). For instance, here’s an “Emerald” policy I created on my lab server:

Sample policy with advanced cloning

Sample policy with advanced cloning

That policy backs up to the Daily pool and then does something new for NetWorker – clones simultaneously to two different pools – “Site-A Clone” and “Site-B Clone”. There’s also something different about the selection process for what gets backed up. The group here is…

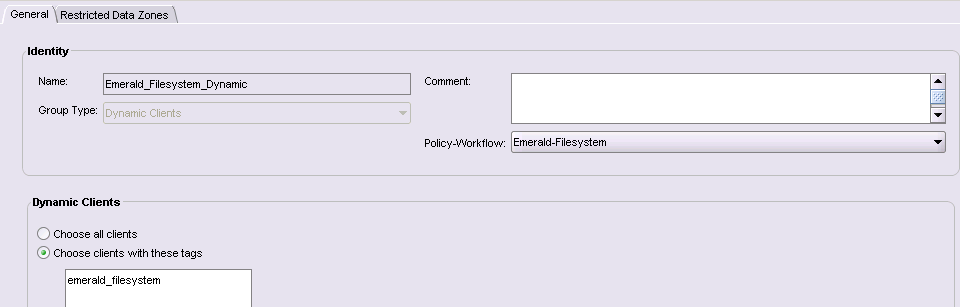
…wait, I need to explain Groups in NetWorker 9. Don’t think they’re like the old NetWorker groups. A group in NetWorker 9 is simply a selection of data sources. That could be a collection of clients, a collection of virtual machines, a collection of NAS systems or a collection of savesets (for cloning/staging). That’s it though: groups don’t start backups, control cloning, etc.

…the group here is a dynamic group. This is a new option for traditional clients. Rather than being an explicit list of clients, a dynamic group is assembled at the time the workflow is executed based on a list of tags defined in the group list. Any client with a matching tag is automatically included in the backup process. This allows for hosts to be moved easily between different policies and workflows through just by changing the tags associated with it. (Alternatively, it might be configured as automatically selecting every client.)

NetWorker 9 Dynamic Groups

NetWorker 9 Dynamic Groups

There’s a lot more to the policy engine than just what I’ve covered above, but there’s also a lot more I need to cover, so I’ll stop for now and come back to the new policy engine in more detail in a future blog post.

Policy Migration

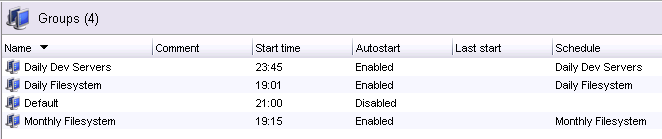
Actually, there’s one other thing I’ll mention about policies before I continue, and that’s the policy migration process. When you upgrade a NetWorker server to NetWorker 9, your existing configuration is migrated (and as you might imagine this migration process is something that’s received a lot of attention and testing). For example, a “classic” NetWorker environment that consists of a raft of groups. On migration, each group is converted into a workflow of the same name and placed under a new policy called Backup. So a basic group list of say, “Daily Dev Servers”, “Daily Filesystem” and “Monthly Filesystem” will get converted accordingly. Here’s what the group list looks like under v8 (with the default Default group):

NetWorker 8 Group List

NetWorker 8 Group List

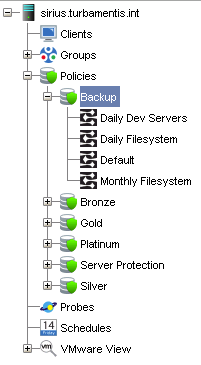
Under version 9, this becomes the following policy and workflows:

NetWorker 9 Converted Policy

NetWorker 9 Converted Policy

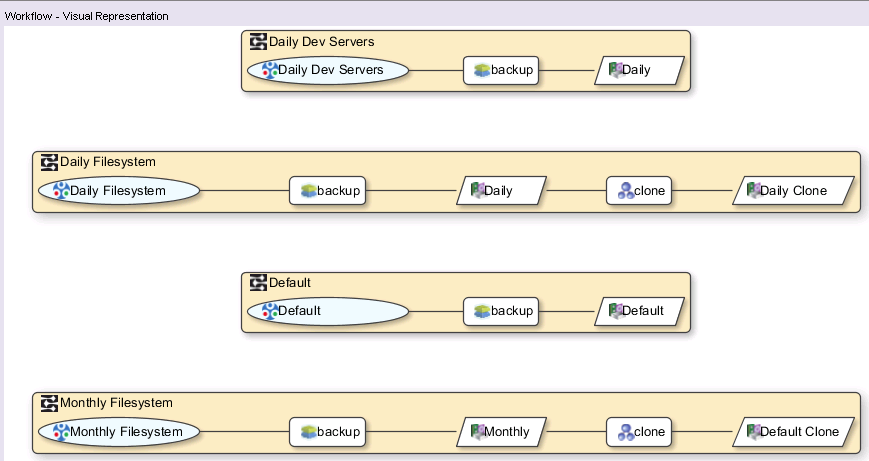
The workflow visualisation for the groups above converted into policy format is:

NetWorker 9 Converted Policy Workflow Visualisation

NetWorker 9 Converted Policy Workflow Visualisation

(By the way, that “Monthly Filesystem” workflow cloning to the “Default Clone” pool was just a lazy error on my part while setting up a test server – not an error.)

I know lots of people tested some fairly hairy configuration migrations. If I recall correctly the biggest configuration I tested had over 1000 clients defined and around 300 groups, schedules, etc., associated with those clients. And I did a whole bunch of shortcuts and tricks in schedules and they converted successfully.

The back-end changes

I’ll undoubtedly do some additional blog articles about the NetWorker 9 policy engine, but it’s time to move on to other topics and other changes within NetWorker. I’ll start with some back-end changes to the environment.

Media database

The “WISS” database format has been around for as long as I can recall with NetWorker. It’s served NetWorker well, but it’s also had some limitations. As of version 9, the NetWorker media database format is now SQLite, which gives NetWorker a big boost for performance and parallelisation of media activities. As per the policy engine, this migration happens automatically for you as part of the upgrade process. (Depending on the size of your media database this may take a little while to complete, but the media database is usually fairly small for most organisations.)

NetWorker Management Console (NMC) Database

Previous versions of NetWorker have used the Sybase embedded SQLAnywhere database for NMC. NetWorker version 9 switches the NMC database to PostgreSQL. If you’re wanting to keep your existing NMC database, you’ll need to take some pre-ugprade steps to export the Sybase embedded database content into a format that can be imported into the PostgreSQL database. Be sure to read the upgrade documentation – but you were going to do that anyway, right?

License Server

Other than the options around traditional vs NetWorker capacity vs DPS capacity, NetWorker licensing has remained mostly the same for the entire 19 years I’ve been dealing with it. There was a Legato License Manager introduced some time ago but it had mainly been pushed as a means of centralising management of traditional licensing across multiple datazones. Since the capacity formats aren’t so bothered on datazone counts, LLM usage has fallen away.

With a lot of customers deploying multiple EMC products and EMC moving towards transformative enterprise licensing models, a move to a new licensing service that can handle licensing for multiple products makes sense. From a day to day basis, the licensing server won’t really change how you interact with NetWorker, but you’ll want to deal with your sales/pre-sales team or your integrator (depending on which way you procure NetWorker licenses) in order to prep for the license changes. It’s not a change to functionality of traditional vs capacity licenses, and it doesn’t signal a move away from traditional licenses either, but it is a much needed change.

Authentication System

NetWorker has by and large used OS provided user-authentication for authorisation. That might be localised on a per-system basis or it might leverage Active Directory/etc. This however left somewhat of a split between authorisation supported by NetWorker Management Console and authorisation supported from the command line. The new authentication system is effectively a single sign-on approach providing integrated authentication between NMC related activities and command line activities.

Restricted Data Zones

Restricted datazones get a few tweaks with NetWorker 9, too. I’ve had very little direct cause to use RDZs myself, so I’ll let the release notes speak for themselves on this front:

  • You can now associate an RDZ resource to an individual resource (for example, to a client, protection policy, protection group, and so on) from the resource itself. As a result, RDZ resources can no longer effect resource associations directly.

  • Non-default resources, that are previously associated to the global zone and therefore unusable by an RDZ, are now shared resources that can be used by an RDZ. Although, these resources cannot be modified by restricted administrators.

If you’re using RDZs in your environment, be sure to understand the implications of the above changes as part of the upgrade process.

Scaling

With a raft of under-the-hood changes and enhancements, NetWorker servers – already highly scaleable – become even more scaleable. If your NetWorker environment has been getting large enough that you’ve considered deploying additional datazones, now is the time to talk to your local EMC teams to see whether you still need to go down that path. (Chances are you don’t.)

NetWorker Server Platform

There are actually very few environments left where the NetWorker server itself runs on what I’d refer to as “classic” Unix systems – i.e., Solaris, HPUX or AIX. As of NetWorker 9, the NetWorker server processes (and similarly, NMC processes) will now run only on Windows 64-bit or Linux 64-bit systems. This allows a concentration of development, leveraging the substantially (I’d say massively) reduced use of these platforms for better development efficiencies. However, NetWorker client support is still extremely healthy and those platforms are also still fully supported as storage nodes.

From a migration perspective, this is actually relatively easy to handle. EMC for some time has supported cross platform migration, wherein the NetWorker media database, configuration and index (i.e., the NetWorker server) is moved from say, Linux to Windows, Solaris to Linux, Solaris to Windows, etc. If you are one of those sites still using the NetWorker server services on Solaris, HPUX or AIX, you can engage cross platform migration services and transfer across to Windows or Linux. To keep things simple (I’ve done this dozens of times myself over the years), consider even keeping the old server around, renaming it and turning it into a storage node so you don’t really have to change any device connectivity. Then, elevate the backup server to a “director only” mode where it’s not actually doing any client backup itself. All up, this sort of transition can be seamlessly achieved in a very short period of time. In short: it may be a small interruption and change to your processes, but having executed it many times myself in the past, I can honestly say it’s a very small change in the grand scheme of things, and very manageable.

In summary, the options along this front if you’re using a non-Windows/non-Linux NetWorker server are:

  • Do a platform migration of your NetWorker server to Windows or Linux using your current NetWorker version, then upgrade to the new version
  • Stand up a new NetWorker datazone on Windows or Linux and retain the existing one for legacy recoveries, migrating clients across

I’m actually a big fan of the former rather than the latter – I really have done enough platform migrations to know they work well and they allow you to retain everything you’ve been doing. (IMHO the only reason to not do a platform migration is if you have a very short retention period for all of your backups and you want to start with a brand new configuration approach.)

(Cross platform migrations do have to be done by an authorised party – if you’re not sure who near you can do cross platform migrations, reach out to your local EMC team and find out.)

One more thing: with the additional services now running on a NetWorker server, you could need more RAM/CPU in your server. Check out the release notes for some details on this front. Environments that have been sized with room for spare likely won’t need to worry about this at all – but if you’ve got an environment where you’ve got an older piece of hardware running as your NetWorker server, you might need to increase its performance characteristics a little.

[Clarifying point: I’m only talking about the NetWorker server platform. Traditional Unix systems remain fully supported for storage nodes and clients.]

Cloning

NetWorker gets a performance and optimisation boost with cloning. Cloning has previously been a reasonably isolated process compared to regular save or recovery operations. With NetWorker 9, cloning is now a more integrated function, leveraging the in-place recovery technology implemented in NetWorker 8.2 to speed up cloning of synthetic backups.

This has some advantages relating to parallelising clones and limiting the need for additional nsrmmd processes to handle the cloning operation, and introduces scope for exciting changes in future versions of NetWorker, too.

With continuing advances in how you can configure and manage cloning from within NetWorker policies, manual command line driven cloning is becoming less necessary, but if you do still use it you’ll notice some difference in the output. For instance:

[root@sirius ~]# mminfo -q "name=/usr,savetime>=24 hours ago" -r ssid
4278951844
[root@sirius ~]# nsrclone -b "Site-A Clone" -S 4278951844
140988:nsrclone: launching backend job on host sirius.turbamentis.int
140990:nsrclone: Backend started: job Id(160004).
85401:nsrrecopy: Input client or saveset is NULL, information not updated in jobdb
09/30/15 18:48:04.652904 Clone pool size used:4
09/30/15 18:48:04.756405 Init Clone PARAMS: Network constant(73400320) Saveset computation overhead(2000000 microsec) Threshold(600000000 microsec) MIN-Threads(16) MAX-Threads(32)
09/30/15 18:48:04.757495 Adjust Clone param: Total overhead(50541397 microsec) Threshold(12635349 microsec) MIN-threads(1) MAX-Threads(4)
09/30/15 18:48:04.757523 Add New saveset group(0x0x3fe5db0): Group overhead(50541397 microsec) Num ss(1)
129290:nsrrecopy: Successfully established direct file retrieve session for save-set ID '4278951844' with adv_file volume 'Daily.001'.
09/30/15 18:49:30.765647 nsrrecopy exiting
140991:nsrclone: Backend exited: job Id(160004).
 [ORIGINAL REQUESTED SAVESETS]
4278951844;
 [CLONE SUCCESS SAVESETS]
4278951844/1443603606;

Note that while the command line output is a little difference, the command line options remain the same so your scripts can continue to work without change there. However, with enhanced support for concurrent cloning operations you’ll likely be able to speed up those scripts … or replace them entirely with new policies.

Performance tuners win too

The performance tuning and optimisation guide has been getting more detailed information over more recent versions, and the one that accompanies NetWorker 9 is no exception. For example, there’s an entire new section on TCP window size and network latency considerations that a bunch of examples (and graphs) relating to the impact of latency on backup and cloning operations of varying sizes based on filesystem density. If you’re someone who likes to see what tuning and adjustment options there are in NetWorker, you’ll definitely want to peruse the new Performance Tuning/Optimisation guide, available with the rest of the reference documentation.

(On that front, NDMP has now been broken out into its own document: the NDMP User Guide. Keep an eye on it if you’re working with NAS systems.)

Additional Features

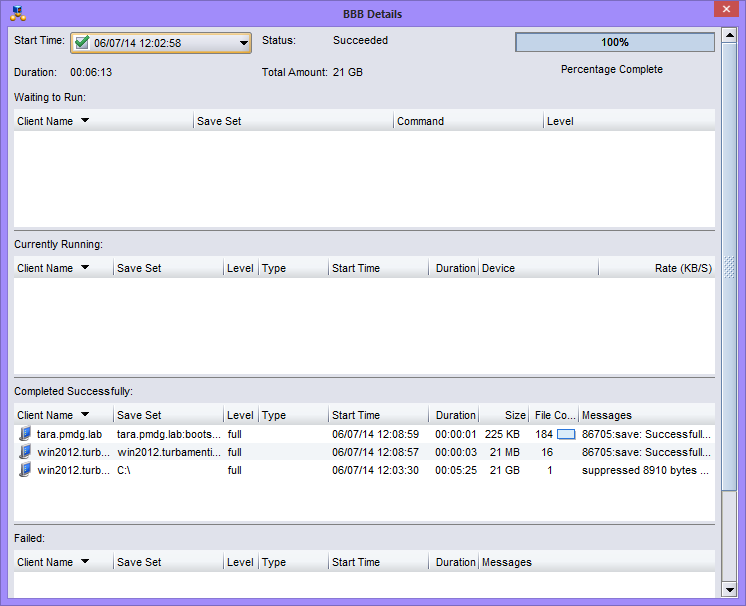
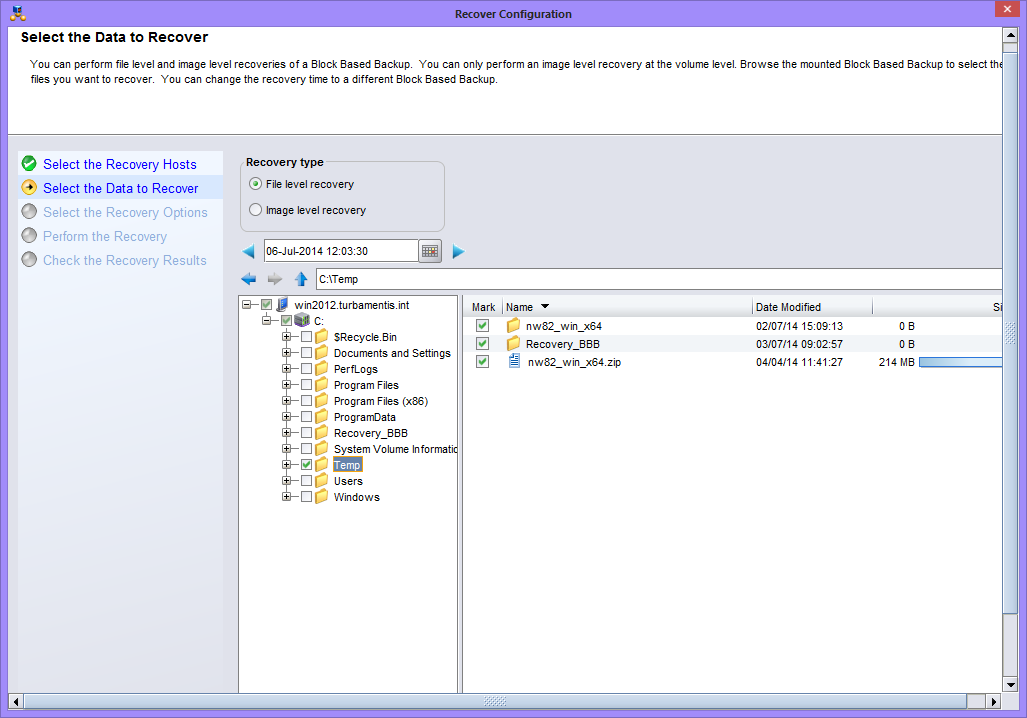
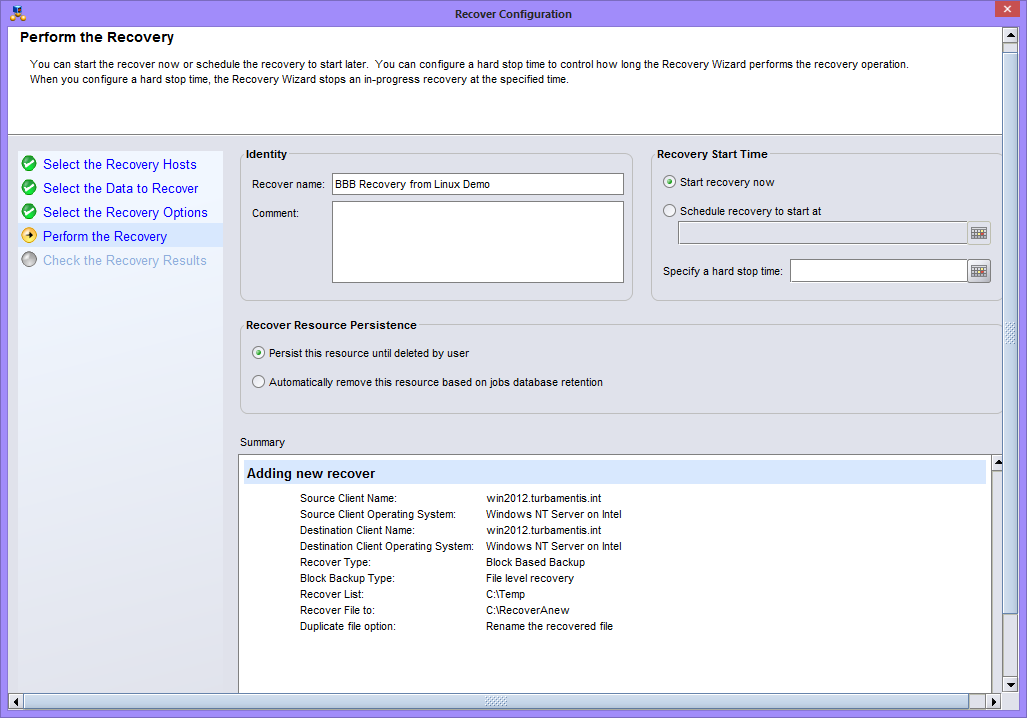
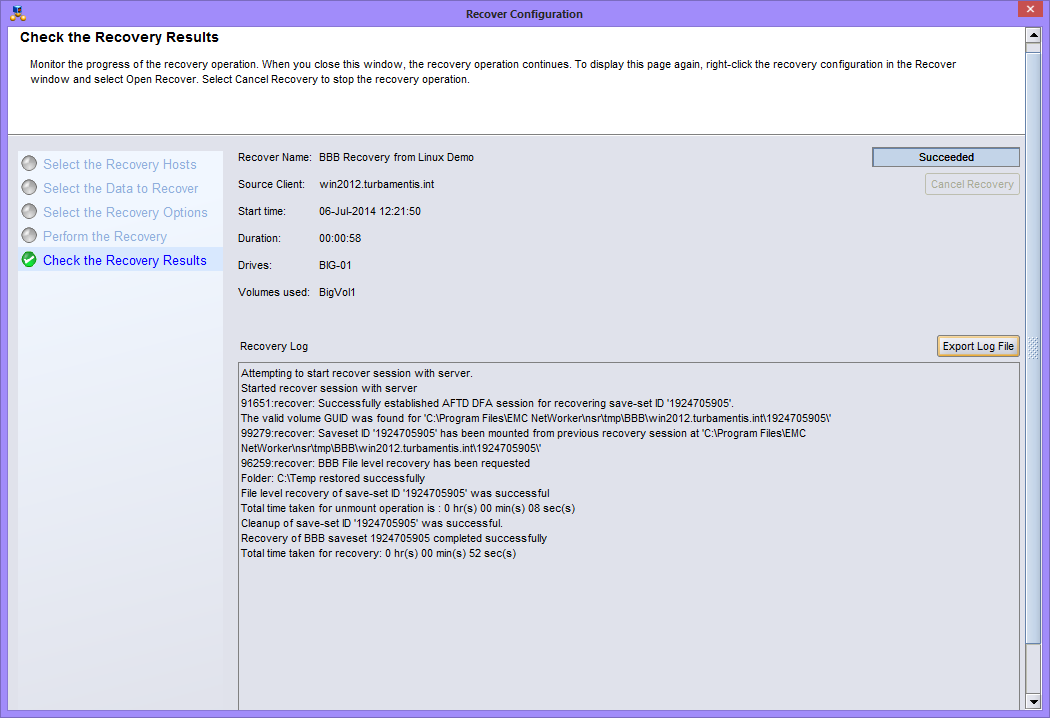
Block Based Backup (BBB) for Linux

Several Linux operating systems and filesystems now get the option of performing block based backups. This can significantly speed up the backup of large/dense filesystems – even more so than parallel save streams – by actually bypassing the filesystem entirely. It’s been available in Windows backups for a while now, but it’s hopped over the fence to Linux as well. Like the Windows variant, BBB doesn’t require image level recovery – you can do file level recovery from block based backups. If you’ve got really dense filesystems (I’m looking at large scale IMAP servers as a classic example), BBB could increase your backup performance by up to an order of magnitude.

Parallel Save Streams

Parallel Save Streams certainly aren’t forgotten about in NetWorker 9. There are now options to go beyond 4 parallel save streams per saveset for PSS enabled clients, and we’ve seen the introduction of automatic stream reclaiming, which will dynamically increase the number of active streams for a saveset already running in PSS mode to maximise the utilisation of client parallelism settings. (That’s a mouthful. The short: PSS is more intelligent and more reactive to fluctuations in used parallelism on clients.)

ProtectPoint

ProtectPoint is a pretty exciting new technology being rolled out by EMC across its storage arrays and integrates with Data Domain for the back-end storage. To understand what ProtectPoint does, consider a situation where you’ve got say, a 100TB Oracle database sitting on a VMAX3 system, and you need to back it up as fast as possible with as little an impact to the actual database server itself as possible. In conventional agent-based backups, it doesn’t matter what tricks and techniques you use to mitigate the amount of data flowing from the Oracle server to the backup environment, the Oracle server still has to read the data from the storage system. ProtectPoint is an application aware and application/integrated system that allows you to seamlessly have the storage array and the Data Domain handle pretty much the entire backup, with the data transfer going directly from the storage array to the Data Domain. Suddenly that entire-database server read load associated with a conventional backup disappears.

NetWorker v9 integrates management of ProtectPoint policies in a very similar way to how NetWorker v8.2 introduced highly advanced NAS snapshot service integration into the data protection management. This further grows NetWorker’s capabilities in orchestrating the overall data protection process in your environment.

(There’s a good overview demo of ProtectPoint over at YouTube.)

NVE

Some people want to be able to stand up and completely control a NetWorker environment themselves, and others want to be able to deploy an appliance, answer a couple of questions, and have a fully functioning backup environment ready for use. NetWorker Virtual Edition (NVE) addresses the needs and desires of the latter. For service providers or businesses deploying remote office protection solutions, NVE will be a boon – and it won’t eat into any operating system licensing costs, as the OS (Linux) is bundled with the virtual machine template file.

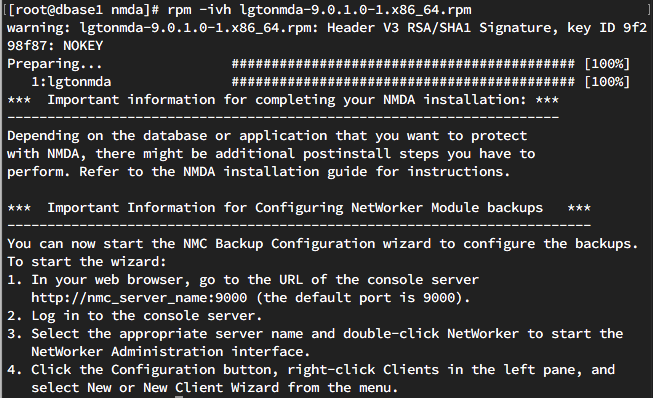
Base vs Extended Client Installers

For Unix systems, NetWorker now splits out the client package into two separate installers – the base version and the extended version – lgtoclnt and lgtoxtdclnt respectively. You install the base client on clients that need to get fairly standard filesystem backups. It doesn’t include binaries like mminfo, nsrwatch or nsradmin – they’re now in the extended package. This allows you to keep regular client installs streamlined – particularly useful if you’re a service provider or dealing with larger environments.

VBA

There’s been a variety of changes made to the Virtual Backup Appliance (introduced in NetWorker 8.1), but the two I want to particularly single out are the two that users have mentioned most to me over the last 18 months or so:

  • Flash is no longer required for the File Level Recovery (FLR) web interface
  • There’s a command line interface for FLR

If you’ve been leery about using VBA for either of the above reasons, it’s time to jump on the bandwagon and see just how useful it is. Note that in order to achieve command line FLR you’ll need to install the basic NetWorker client package on the relevant hosts – but you need to get a binary from somewhere, so that makes sense.

Module Enhancements

Both the NetWorker Module for Microsoft Applications (NMM) and NetWorker Module for Databases and Applications (NMDA) have received a bunch of updates, including (but not limited to):

  • NMM:
    • Simpler use of VSS.
    • Block based support for HyperV and Exchange – yes, and Exchange. (This speeds up both types of backups considerably.)
    • Federated backups for SharePoint, allowing non-primary databases to be leveraged for the backup process.
    • I love the configuration checker – it makes getting NMM up and running with minimum effort so much easier. It’s been further enhanced in NetWorker 9 to grow its usefulness even more.
    • HyperV support for Partial VSS writer – previously if you had a single VM fail to backup under HyperV the backup group running the process would register as a failure. Now the backups will continue and only the VM that fails to backup will be be declared a failure. This aligns HyperV backups much more closely to traditional filesystem or VMware style backups.
    • Improved support for Federated backups of HyperV SMB 3 clusters.
    • File Level Recovery GUI for HyperV virtual machine backups.
    • Full integration of policy support for NMM.
  • NMDA:
    • Support for DDBoost over Fibre-Channel for AIX.
    • Full integration of policy support for NMDA.
    • Support for log-only backups for Lotus Notes systems.
    • NetWorker Snapshot Manager support for features like ProtectPoint.
    • Various DB2 enhancements/improvements.
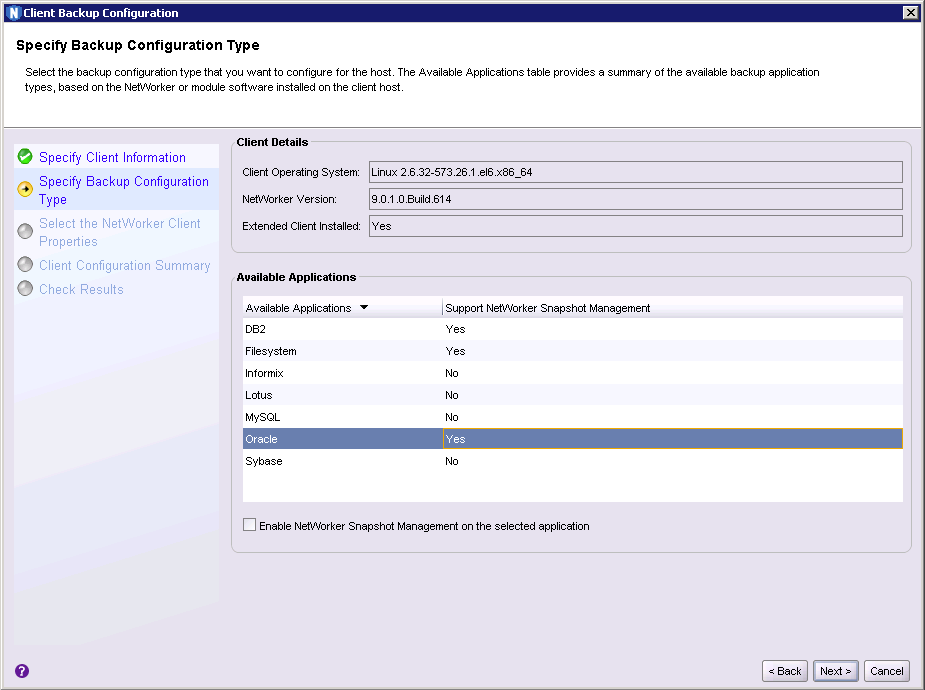
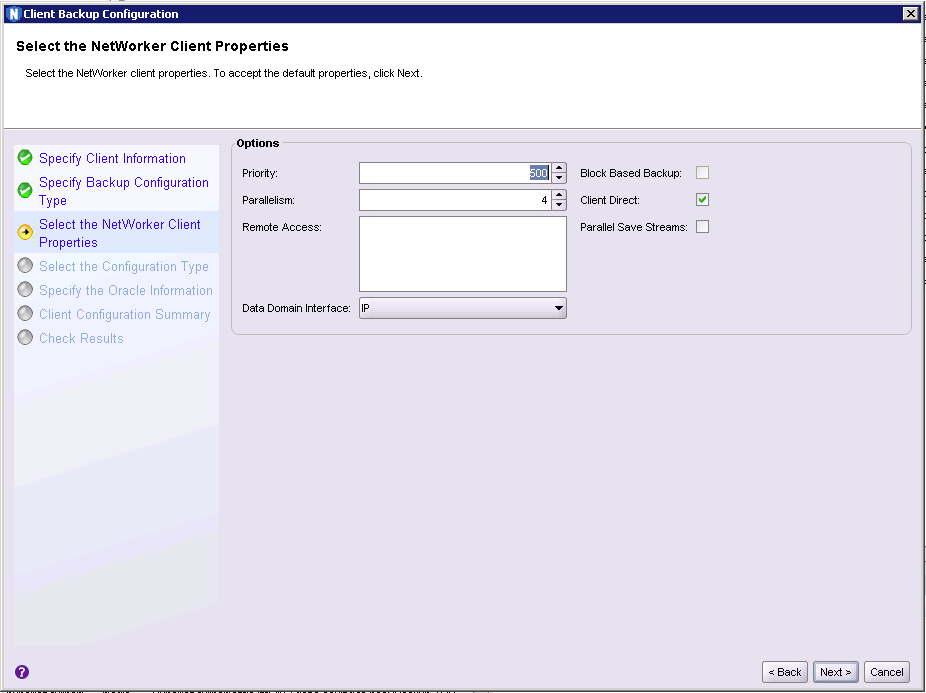
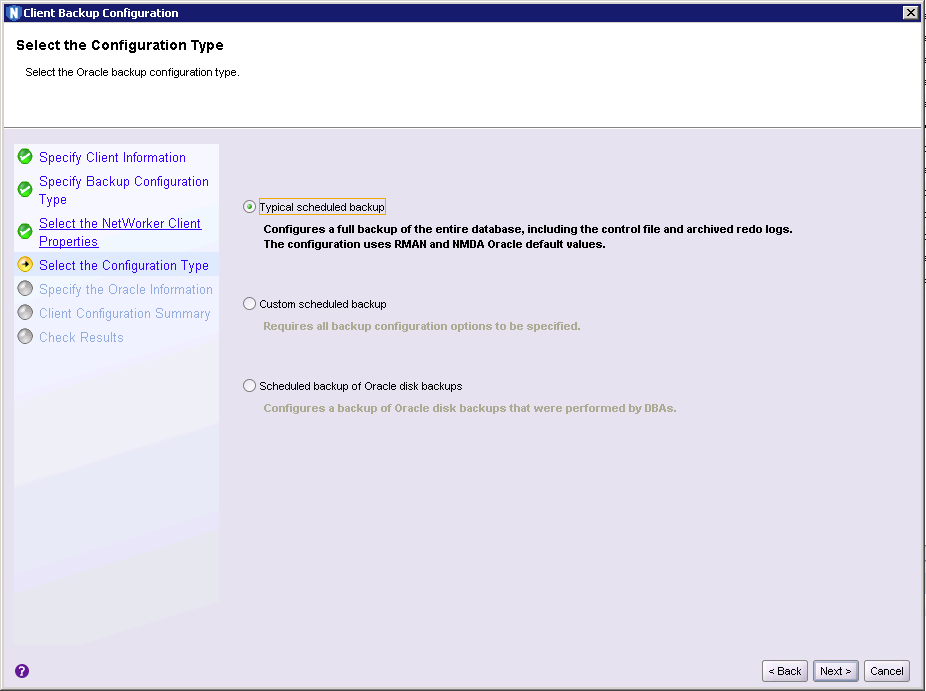
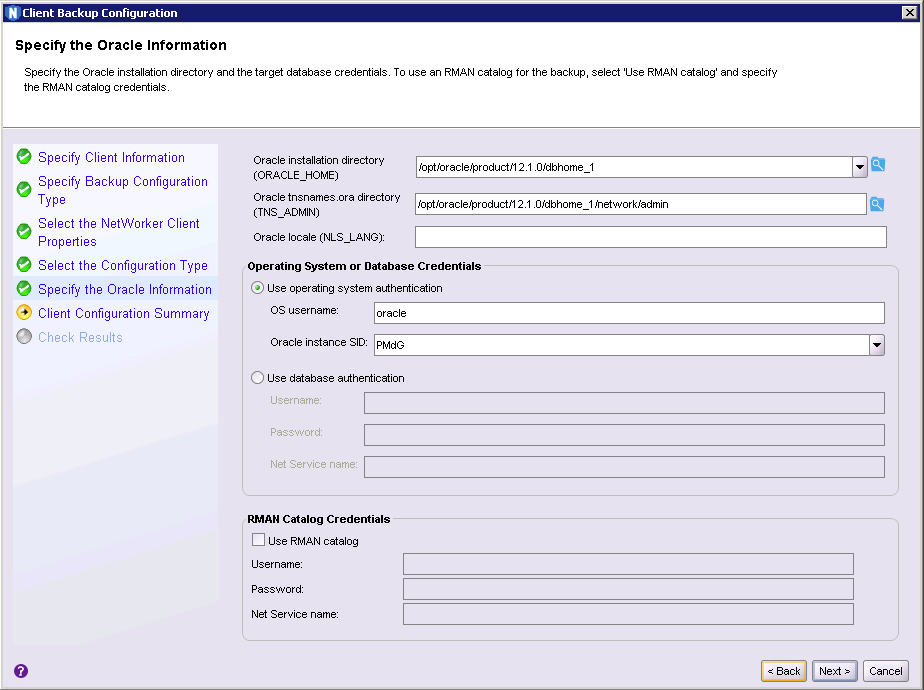
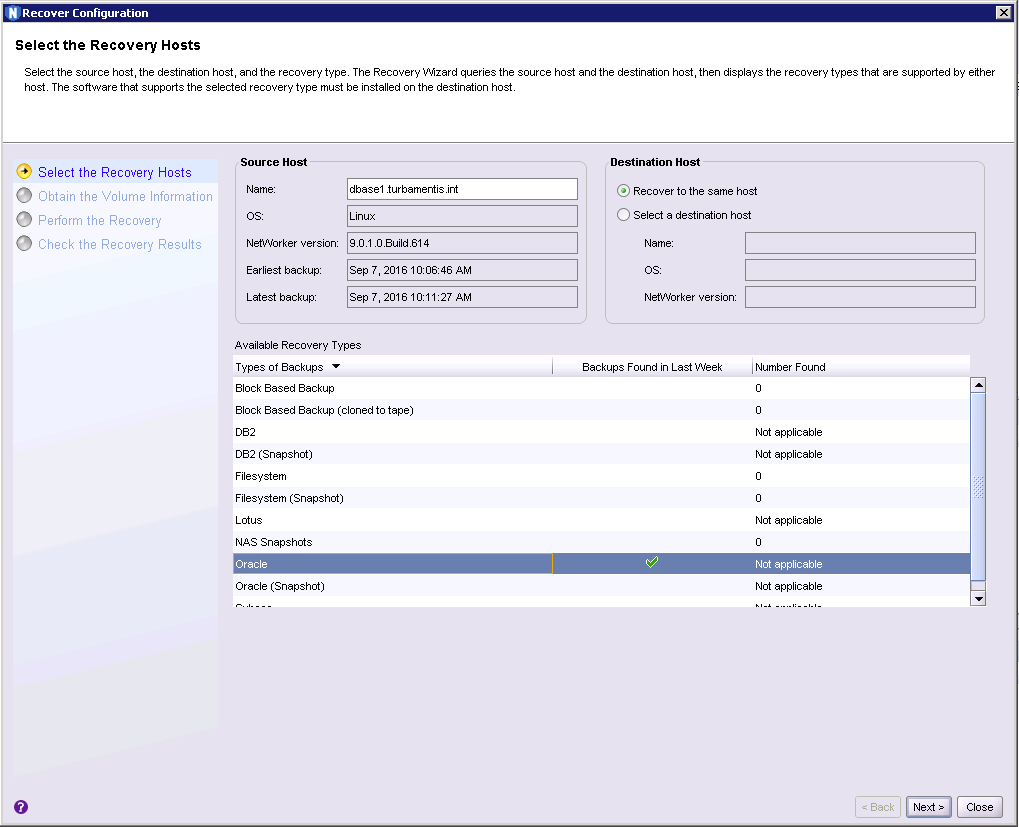
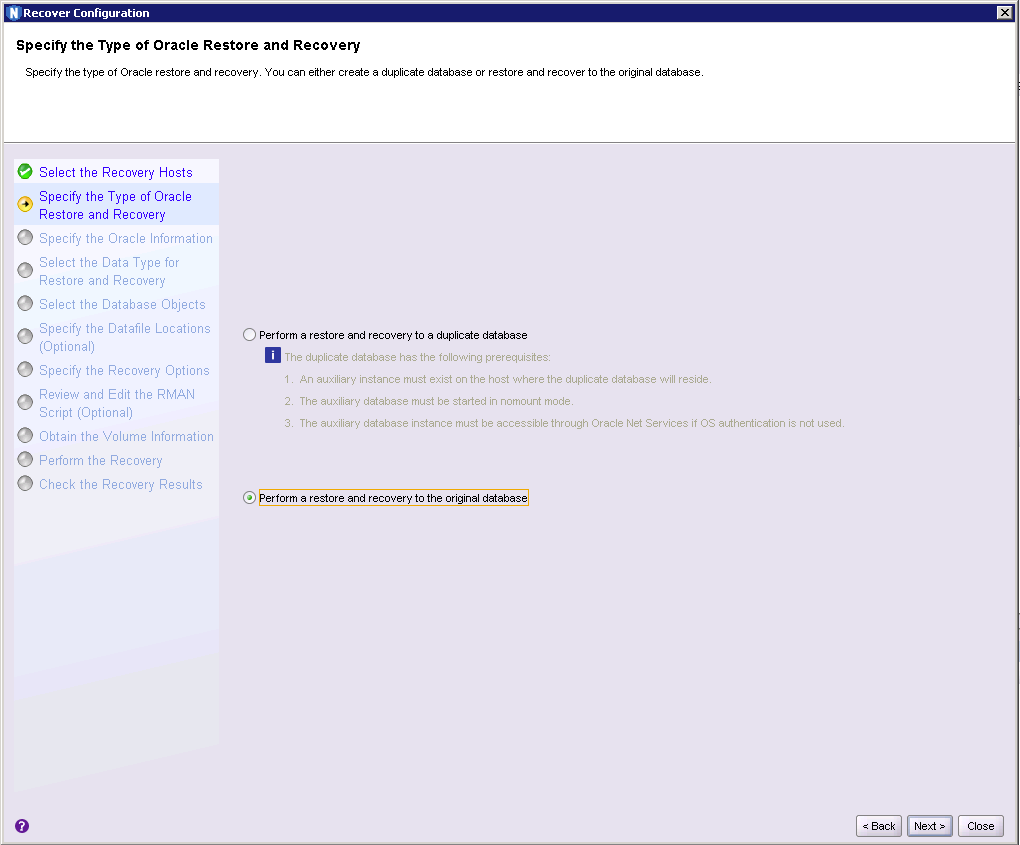
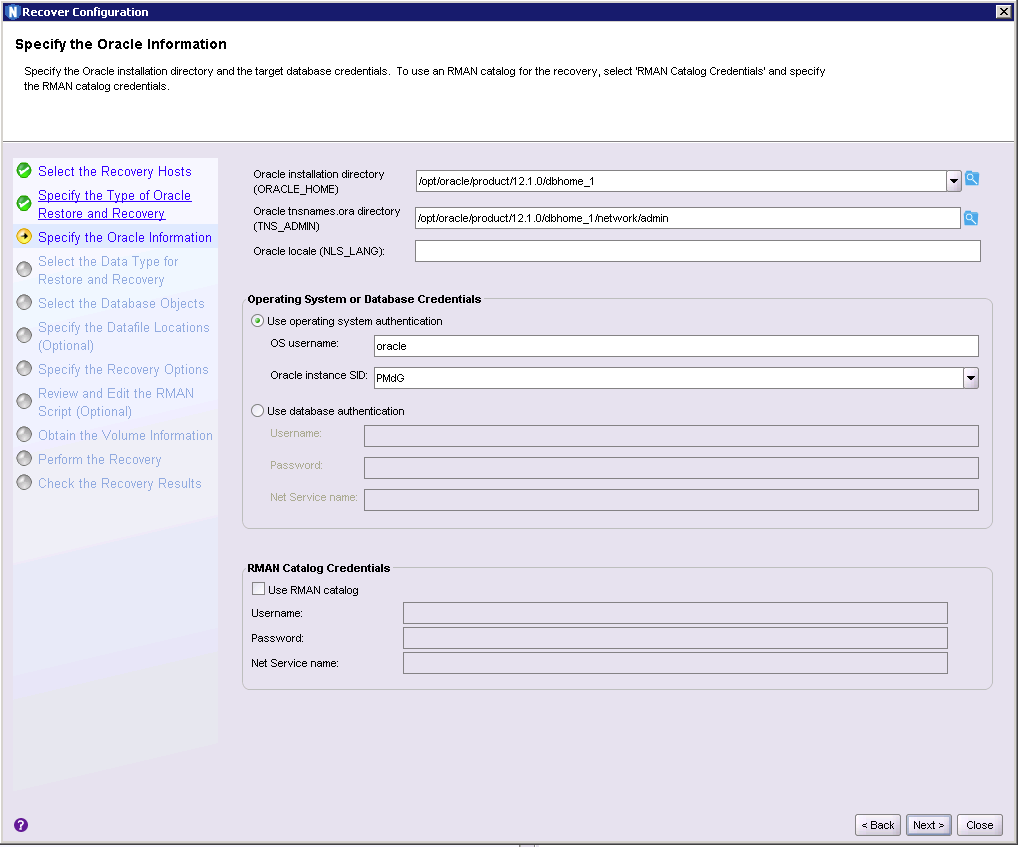
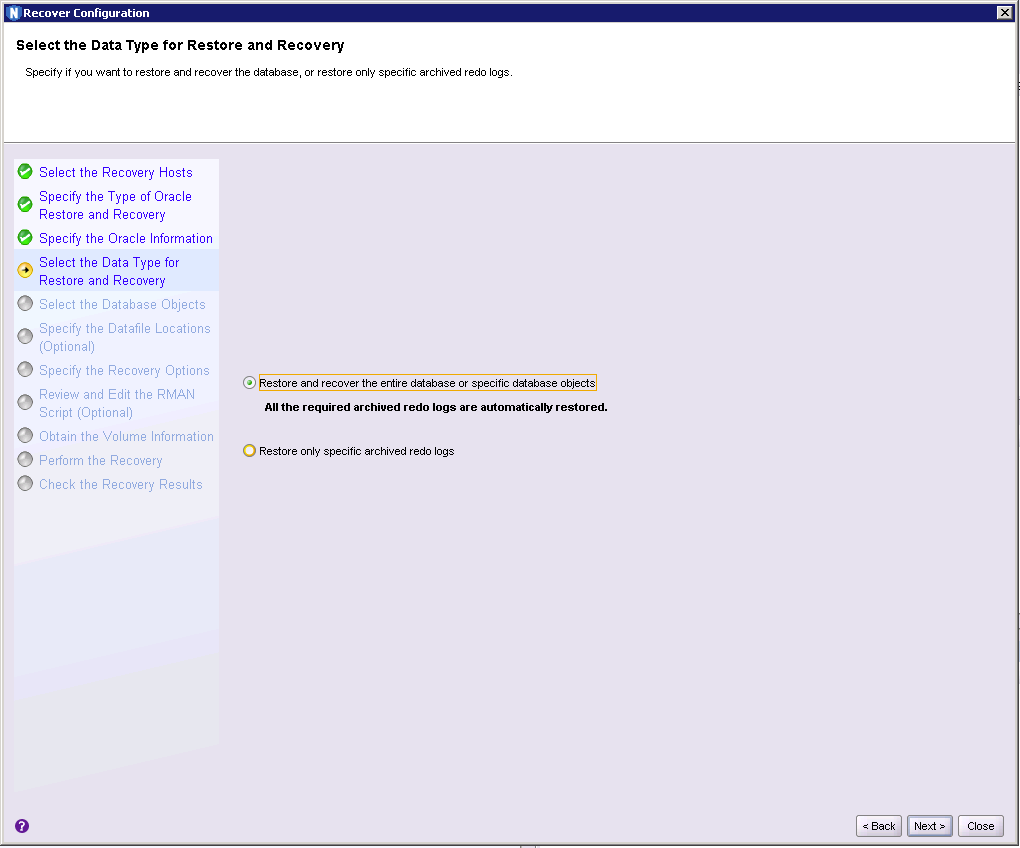
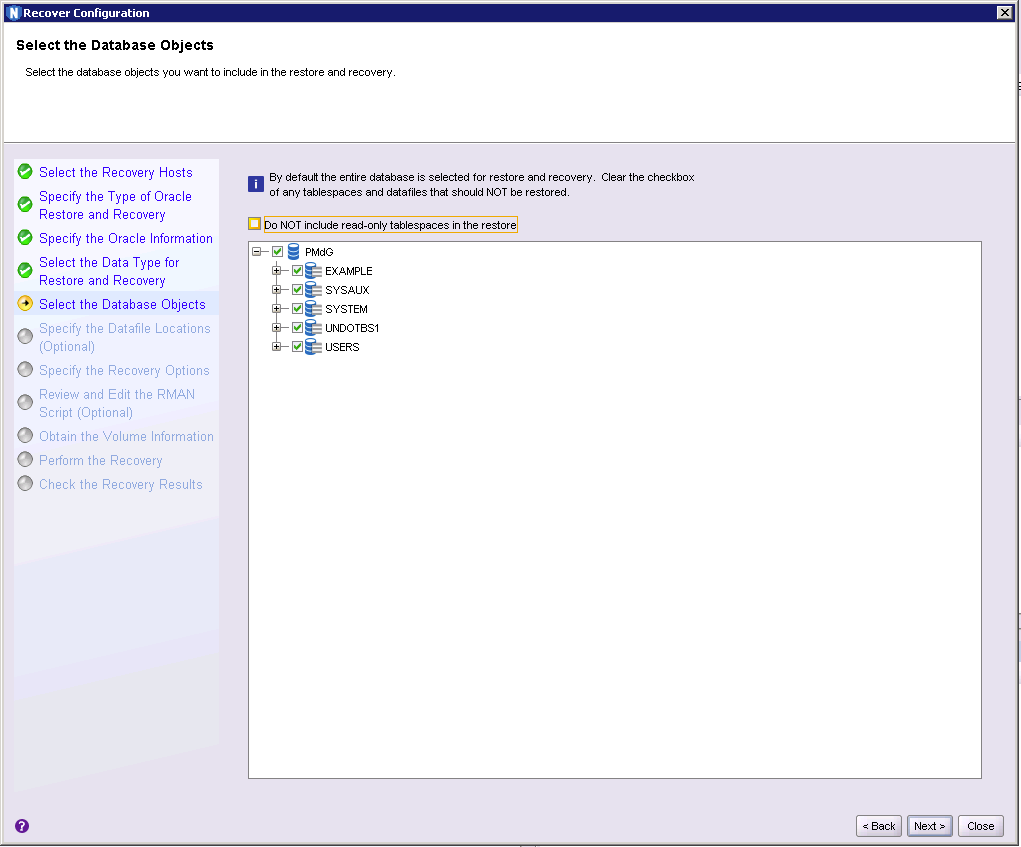
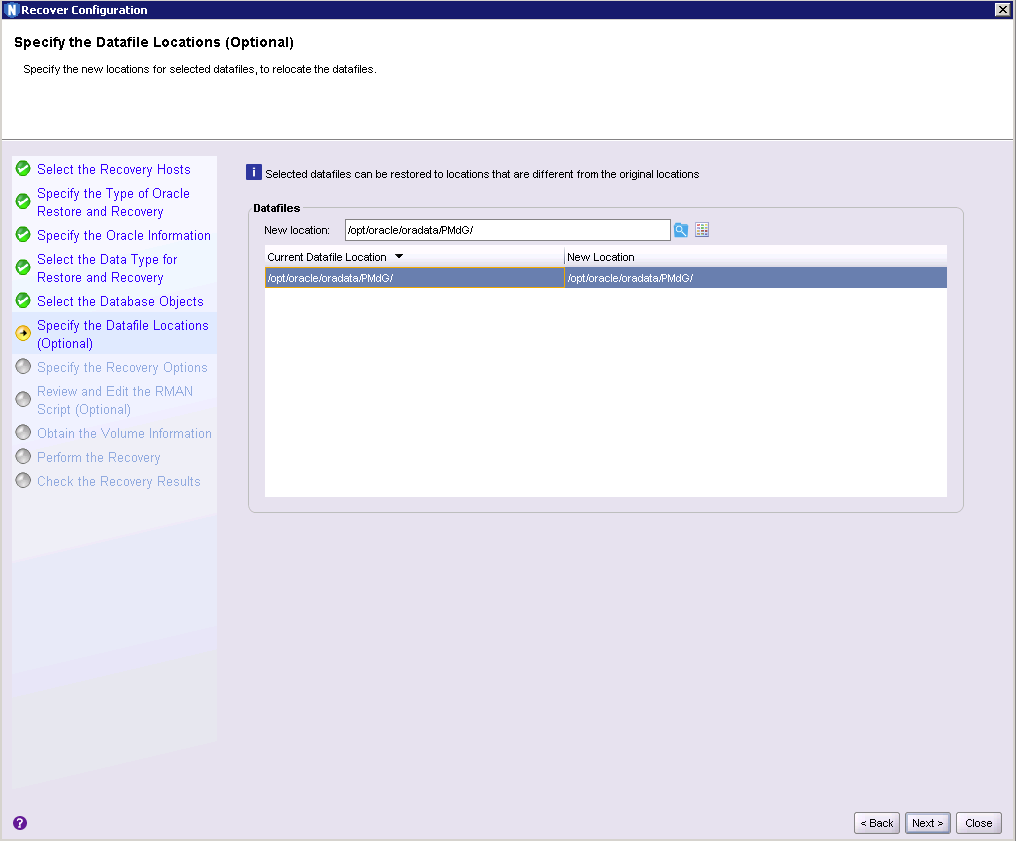
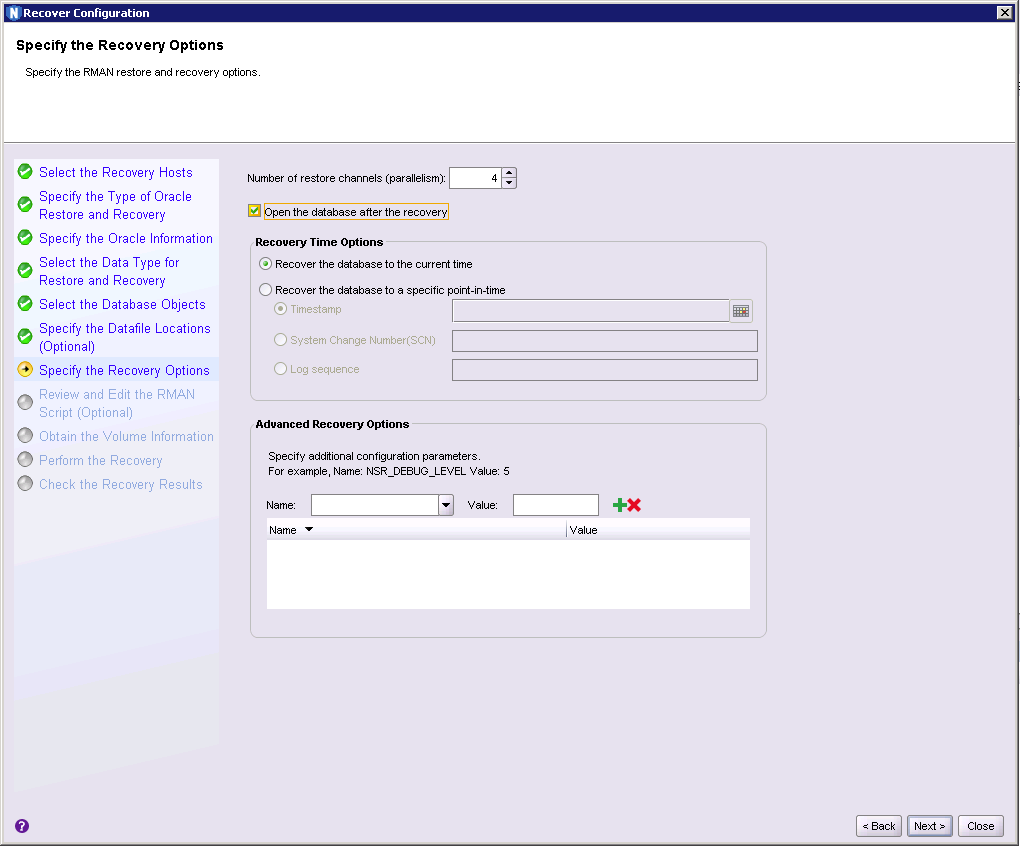
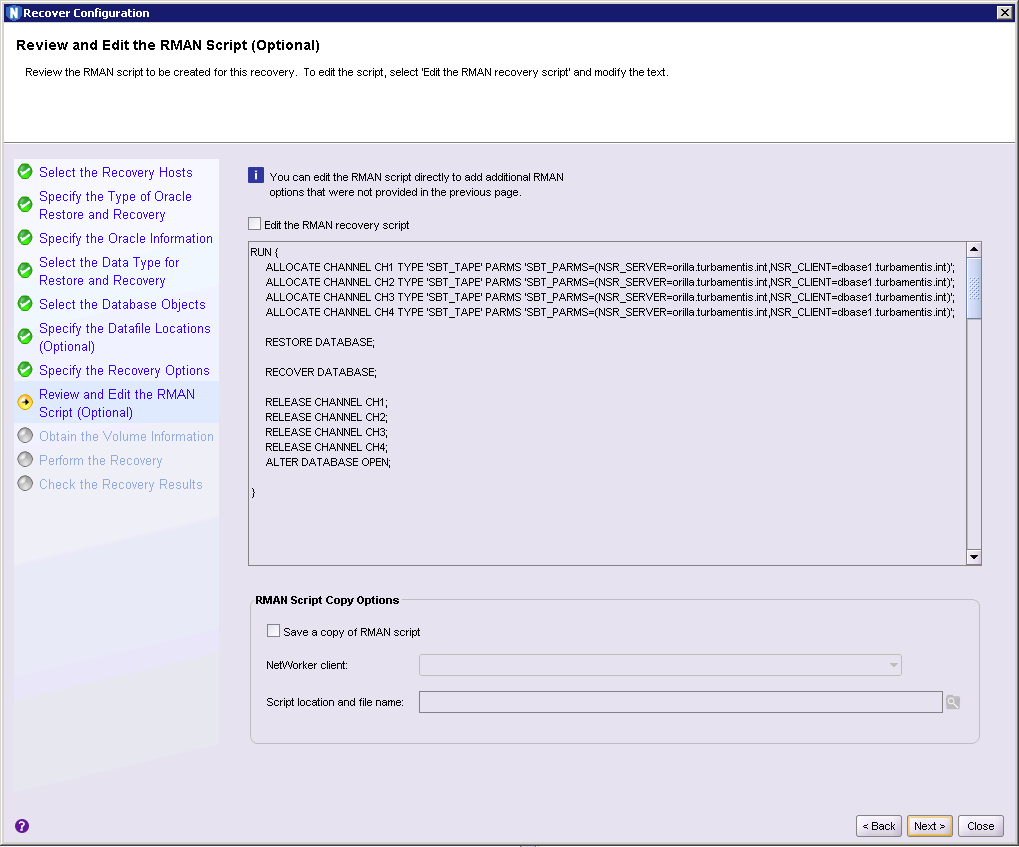
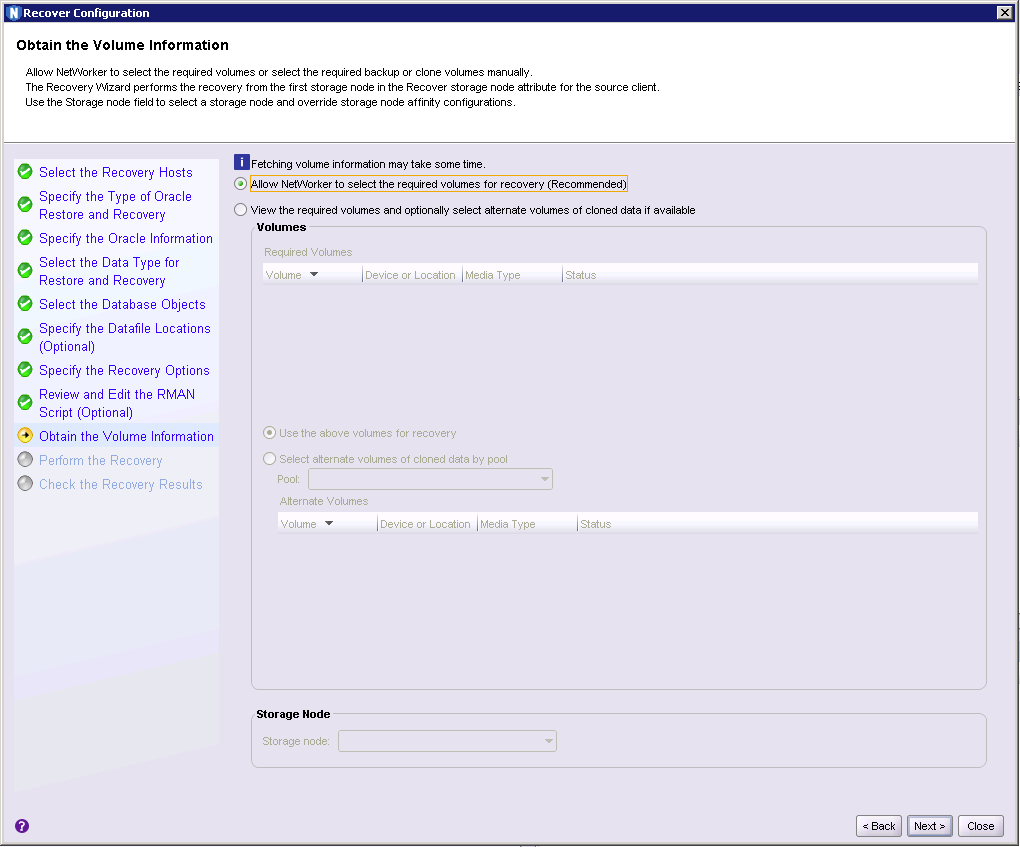
    • Oracle RAC discovery in the NMC configuration wizards.
    • Optional use of a CONFIG_FILE parameter for RMAN scripts so you can put all the NMDA related customisations for RMAN backups into a single file (or small number of files) and keep that file/those files updated rather than having to make changes to individual RMAN scripts.

Policies, Redux

Before I wrap up: just one more thing. With the transition to a policy configuration engine, the nsrpolicy command previously introduced in NetWorker 8.1 to support Virtual Machine Protection Policies has been extensively enhanced to be able to handle all aspects of policy creation, configuration adjustment and policy/workflow execution. This does mean that if you’ve previously used nsradmin or savegrp to handle configuration/group execution processes, you’ll have to adjust some of your scripts accordingly. (It also means I’ll have to work on a new version of the Turbocharged NetWorker Administration Guide.)

Wrapping Up

I wasn’t joking at the start when I said NetWorker 9 represents the biggest set of changes I’ve ever seen in my 19 years of using NetWorker. What I will say is that these are necessary changes to prepare NetWorker for the rapidly changing datacentre. (Or even the rapidly changing datacenter if you’re so minded.)

This upgrade will require very careful review of the release notes and changed functionality, as well as potentially revisiting any automation scripts you’ve done in the past. (But you can do it.) If you’ve got a heavily scripted environment, my advice is to run up a test NetWorker 9 server and review your scripts against the changes, first evaluating whether you actually need to continue using those scripts, and then if you do, adjusting them accordingly. EMC has also prepared some video training for NetWorker 9 which I’d advise looking into (and equally I’d suggest leveraging your local EMC partner or EMC resources for the upgrade process).

It’s also an excellent time to consider revisiting your overall backup configuration and look for optimisations you can achieve based on the new policy engine and the service-catalogue approach. As I’ve been saying to my colleagues, this is the perfect opportunity to introduce policies that align to service catalogues that more precisely define and meet business requirements. If you’re not ready to do it from day zero, that’s OK – NetWorker will migrate your configuration and you’ll be able to continue to offer your existing backup and recovery services. But if you find the time to re-evaluate your configuration and reset it to a service catalogue approach, you can migrate yourself from being the “backup admin” to being the “data protection architect” within your organisation.

This is a big set of changes in NetWorker, but it’s also very much an exciting and energising set of changes, too.

As you might expect, this won’t be my only blog post on NetWorker 9 – it’s equally an energising time for me and I’m looking forward to diving into a variety of topics in more detail and providing some screen casts and videos of changes, upgrades and improvements.

(And don’t forget to wear your sunglasses: the future’s looking bright.)

2015 – that’s a wrap!

$
0
0

As we approach the end of 2015 I wanted to spend a bit of time reflecting on some of the data protection enhancements we’ve seen over the year. There’s certainly been a lot!

Protection

NetWorker 9

NetWorker 9 of course was a big part to the changes in the data protection landscape in 2015, but that’s not by any means the only advancement we saw. I covered some of the advances in NetWorker 9 in my initial post about it (NetWorker 9: The Future of Backup), but to summarise just a few of the key new features, we saw:

  • A policy based engine that unites backup, cloning, snapshot management and protection of virtualisation into a single, easy to understand configuration. Data protection activities in NetWorker can be fully aligned to service catalogue requirements, and the easier configuration engine actually extends the power of NetWorker by offering more complex configuration options.
  • Block based backups for Linux filesystems – speeding up backups for highly dense filesystems considerably.
  • Block based backups for Exchange, SQL Server, Hyper-V, and so on – NMM for NetWorker 9 is a block based backup engine. There’s a whole swathe of enhancements in NMM version 9, but the 3-4x backup performance improvement has to be a big win for organisations struggling against existing backup windows.
  • Enhanced snapshot management – I was speaking to a customer only a few days ago about NSM (NetWorker Snapshot Management), and his reaction to NSM was palpable. Wrapping NAS snapshots into an effective and coordinated data protection policy with the backup software orchestrating the whole process from snapshot creation, rollover to backup media and expiration just makes sense as the conventional data storage protection and backup/recovery activities continue to converge.
  • ProtectPoint Integration – I’ll get to ProtectPoint a little further below, but being able to manage ProtectPoint processes in the same way NSM manages file-based snapshots will be a big win as well for those customers who need ProtectPoint.
  • And more! – VBA enhancements (notably the native HTML5 interface and a CLI for Linux), NetWorker Virtual Edition (NVE), dynamic parallel savestreams, NMDA enhancements, restricted datazones and scaleability all got a boost in NetWorker 9.

It’s difficult to summarise everything that came in NetWorker 9 in so few words, so if you’ve not read it yet, be sure to check out my essay-length ‘summary’ of it referenced above.

ProtectPoint

In the world of mission critical databases where impact minimisation on the application host is a must yet backup performance is equally a must, ProtectPoint is an absolute game changer. To quote Alyanna Ilyadis, when it comes to those really important databases within a business,

“Ideally, you’d want the performance of a snapshot, with the functionality of a backup.”

Think about the real bottleneck in a mission critical database backup: the data gets transferred (even best case) via fibre-channel from the storage layer to the application/database layer before being passed across to the data protection storage. Even if you direct-attach data protection storage to the application server, or even if you mount a snapshot of the database at another location, you still have the fundamental requirement to:

  • Read from production storage into a server
  • Write from that server out to protection storage

ProtectPoint cuts the middle-man out of the equation. By integrating storage level snapshots with application layer control, the process effectively becomes:

  • Place database into hot backup mode
  • Trigger snapshot
  • Pull database out of hot backup mode
  • Storage system sends backup data directly to Data Domain – no server involved

That in itself is a good starting point for performance improvement – your database is only in hot backup mode for a few seconds at most. But then the real power of ProtectPoint kicks in. You see, when you first configure ProtectPoint, a block based copy from primary storage to Data Domain storage starts in the background straight away. With Change Block Tracking incorporated into ProtectPoint, the data transfer from primary to protection storage kicks into high gear – only the changes between the last copy and the current state at the time of the snapshot need to be transferred. And the Data Domain handles creation of a virtual synthetic full from each backup – full backups daily at the cost of an incremental. We’re literally seeing backup performance improvements in the order of 20x or more with ProtectPoint.

There’s some great videos explaining what ProtectPoint does and the sorts of problems it solves, and even it integrating into NetWorker 9.

Database and Application Agents

I’ve been in the data protection business for nigh on 20 years, and if there’s one thing that’s remained remarkably consistent throughout that time it’s that many DBAs are unwilling to give up control over the data protection configuration and scheduling for their babies.

It’s actually understandable for many organisations. In some places its entrenched habit, and in those situations you can integrate data protection for databases directly into the backup and recovery software. For other organisations though there’s complex scheduling requirements based on batch jobs, data warehousing activities and so on which can’t possibly be controlled by a regular backup scheduler. Those organisations need to initiate the backup job for a database not at a particular time, but when it’s the right time, and based on the amount of data or the amount of processing, that could be a highly variable time.

The traditional problem with backups for databases and applications being handled outside of the backup product is the chances of the backup data being written to primary storage, which is expensive. It’s normally more than one copy, too. I’d hazard a guess that 3-5 copies is the norm for most database backups when they’re being written to primary storage.

The Database and Application agents for Data Domain allow a business to sidestep all these problems by centralising the backups for mission critical systems onto highly protected, cost effective, deduplicated storage. The plugins work directly with each supported application (Oracle, DB2, Microsoft SQL Server, etc.) and give the DBA full control over managing the scheduling of the backups while ensuring those backups are stored under management of the data protection team. What’s more, primary storage is freed up.

Formerly known as “Data Domain Boost for Enterprise Applications” and “Data Domain Boost for Microsoft Applications”, the Database and Application Agents respectively reached version 2 this year, enabling new options and flexibility for businesses. Don’t just take my word for it though: check out some of the videos about it here and here.

CloudBoost 2.0

CloudBoost version 1 was released last year and I’ve had many conversations with customers interested in leveraging it over time to reduce their reliance on tape for long term retention. You can read my initial overview of CloudBoost here.

2015 saw the release of CloudBoost 2.0. This significantly extends the storage capabilities for CloudBoost, introduces the option for a local cache, and adds the option for a physical appliance for businesses that would prefer to keep their data protection infrastructure physical. (You can see the tech specs for CloudBoost appliances here.)

With version 2, CloudBoost can now scale to 6PB of cloud managed long term retention, and every bit of that data pushed out to a cloud is deduplicated, compressed and encrypted for maximum protection.

Spanning

Cloud is a big topic, and a big topic within that big topic is SaaS – Software as a Service. Businesses of all types are placing core services in the Cloud to be managed by providers such as Microsoft, Google and Salesforce. Office 365 Mail is proving very popular for businesses who need enterprise class email but don’t want to run the services themselves, and Salesforce is probably the most likely mission critical SaaS application you’ll find in use in a business.

So it’s absolutely terrifying to think that SaaS providers don’t really backup your data. They protect their infrastructure from physical faults, and their faults, but their SLAs around data deletion are pretty straight forward: if you deleted it, they can’t tell whether it was intentional or an accident. (And if it was an intentional delete they certainly can’t tell if it was authorised or not.)

Data corruption and data deletion in SaaS applications is far too common an occurrence, and for many businesses sadly it’s only after that happens for the first time that people become aware of what those SLAs do and don’t cover them for.

Enter Spanning. Spanning integrates with the native hooks provided in Salesforce, Google Apps and Office 365 Mail/Calendar to protect the data your business relies on so heavily for day to day operations. The interface is dead simple, the pricing is straight forward, but the peace of mind is priceless. 2015 saw the introduction of Spanning for Office 365, which has already proven hugely popular, and you can see a demo of just how simple it is to use Spanning here.

Avamar 7.2

Avamar got an upgrade this year, too, jumping to version 7.2. Virtualisation got a big boost in Avamar 7.2, with new features including:

  • Support for vSphere 6
  • Scaleable up to 5,000 virtual machines and 15+ vCenters
  • Dynamic policies for automatic discovery and protection of virtual machines within subfolders
  • Automatic proxy deployment: This sees Avamar analyse the vCenter environment and recommend where to place virtual machine backup proxies for optimum efficiency. Particularly given the updated scaleability in Avamar for VMware environments taking the hassle out of proxy placement is going to save administrators a lot of time and guess-work. You can see a demo of it here.
  • Orphan snapshot discovery and remediation
  • HTML5 FLR interface

That wasn’t all though – Avamar 7.2 also introduced:

  • Enhancements to the REST API to cover tenant level reporting
  • Scheduler enhancements – you can now define the start dates for your annual, monthly and weekly backups
  • You can browse replicated data from the source Avamar server in the replica pair
  • Support for DDOS 5.6 and higher
  • Updated platform support including SLES 12, Mac OS X 10.10, Ubuntu 12.04 and 14.04, CentOS 6.5 and 7, Windows 10, VNX2e, Isilon OneFS 7.2, plus a 10Gbe NDMP accelerator

Data Domain 9500

Already the market leader in data protection storage, EMC continued to stride forward with the Data Domain 9500, a veritable beast. Some of the quick specs of the Data Domain 9500 include:

  • Up to 58.7 TB per hour (when backing up using Boost)
  • 864TB usable capacity for active tier, up to 1.7PB usable when an extended retention tier is added. That’s the actual amount of storage; so when deduplication is added that can yield actual protection data storage well into the multiple-PB range. The spec sheet gives some details based on a mixed environment where the data storage might be anywhere from 8.6PB to 86.4PB
  • Support for traditional ES30 shelves and the new DS60 shelves.

Actually it wasn’t just the Data Domain 9500 that was released this year from a DD perspective. We also saw the release of the Data Domain 2200 – the replacement for the SMB/ROBO DD160 appliance. The DD2200 supports more streams and more capacity than the previous entry-level DD160, being able to scale from a 4TB entry point to 24TB raw when expanded to 12 x 2TB drives. In short: it doesn’t matter whether you’re a small business or a huge enterprise: there’s a Data Domain model to suit your requirements.

Data Domain Dense Shelves

The traditional ES30 Data Domain shelves have 15 drives. 2015 also saw the introduction of the DS60 – dense shelves capable of holding sixty disks. With support for 4 TB drives, that means a single 5RU data Domain DS60 shelf can hold as much as 240TB in drives.

The benefits of high density shelves include:

  • Better utilisation of rack space (60 drives in one 5RU shelf vs 60 drives in 4 x 3RU shelves – 12 RU total)
  • More efficient for cooling and power
  • Scale as required – each DS60 takes 4 x 15 drive packs, allowing you to start with just one or two packs and build your way up as your storage requirements expand

DDOS 5.7

Data Domain OS 5.7 was also released this year, and includes features such as:

  • Support for DS60 shelves
  • Support for 4TB drives
  • Support for ES30 shelves with 4TB drives (DD4500+)
  • Storage migration support – migrate those older ES20 style shelves to newer storage while the Data Domain stays online and in use
  • DDBoost over fibre-channel for Solaris
  • NPIV for FC, allowing up to 8 virtual FC ports per physical FC port
  • Active/Active or Active/Passive port failover modes for fibre-channel
  • Dynamic interface groups are now supported for managed file replication and NAT
  • More Secure Multi-Tenancy (SMT) support, including:
    • Tenant-units can be grouped together for a tenant
    • Replication integration:
      • Strict enforcing of replication to ensure source and destination tenant are the same
      • Capacity quota options for destination tenant in a replica context
      • Stream usage controls for replication on a per-tenant basis
    • Configuration wizards support SMT for
    • Hard limits for stream counts per Mtree
    • Physical Capacity Measurement (PCM) providing space utilisation reports for:
      • Files
      • Directories
      • Mtrees
      • Tenants
      • Tenant-units
  • Increased concurrent Mtree counts:
    • 256 Mtrees for Data Domain 9500
    • 128 Mtrees for each of the DD990, DD4200, DD4500 and DD7200
  • Stream count increases – DD9500 can now scale to 1,885 simultaneous incoming streams
  • Enhanced CIFS support
  • Open file replication – great for backups of large databases, etc. This allows the backup to start replicating before it’s even finished.
  • ProtectPoint for XtremIO

Data Protection Suite (DPS) for VMware

DPS for VMware is a new socket-based licensing model for mid-market businesses that are highly virtualized and want an effective enterprise-grade data protection solution. Providing Avamar, Data Protection Advisor and RecoverPoint for Virtual Machines, DPS for VMware is priced based on the number of CPU sockets (not cores) in the environment.

DPS for VMware is ideally suited for organisations that are either 100% virtualised or just have a few remaining machines that are physical. You get the full range of Avamar backup and recovery options, Data Protection Advisor to monitor and report on data protection status, capacity and trends within the environment, and RecoverPoint for a highly efficient journaled replication of critical virtual machines.

…And one minor thing

There was at least one other bit of data protection news this year, and that was me finally joining EMC. I know in the grand scheme of things it’s a pretty minor point, but after years of wanting to work for EMC it felt like I was coming home. I had worked in the system integrator space for almost 15 years and have a great appreciation for the contribution integrators bring to the market. That being said, getting to work from within a company that is so focused on bringing excellent data protection products to the market is an amazing feeling. It’s easy from the outside to think everything is done for profit or shareholder value, but EMC and its employees have a real passion for their products and the change they bring to IT, business and the community as a whole. So you might say that personally, me joining EMC was the biggest data protection news for the year.

In Summary

I’m willing to bet I forgot something in the list above. It’s been a big year for Data Protection at EMC. Every time I’ve turned around there’s been new releases or updates, new features or functions, and new options to ensure that no matter where the data is or how critical the data is to the organisation, EMC has an effective data protection strategy for it. I’m almost feeling a little bit exhausted having come up with the list above!

So I’ll end on a slightly different note (literally). If after a long year working with or thinking about Data Protection you want to chill for five minutes, listen to Kate Miller-Heidke’s cover of “Love is a Stranger”. She’s one of the best artists to emerge from Australia in the last decade. It’s hard to believe she did this cover over two years ago now, but it’s still great listening.

I’ll see you all in 2016! Oh, and don’t forget the survey.

Who should handle your database backups?

$
0
0

I’ve been working with backups for 20 years, and if there’s been one constant in 20 years I’d say that application owners (i.e., DBAs) have traditionally been reluctant to have other people (i.e., backup administrators) in control of the backup process for their databases. This leads to some environments where the DBAs maintain control of their backups, and others where the backup administrators maintain control of the database backups.

Junction

So the question that many people end up asking is: which way is the right way? The answer, in reality is a little fuzzy, or, it depends.

When we were primarily backing up to tape, there was a strong argument for backup administrators to be in control of the process. Tape drives were a rare commodity needing to be used by a plethora of systems in a backup environment, and with big demands placed on them. The sensible approach was to fold all database backups into a common backup scheduling system so resources could be apportioned efficiently and fairly.

DB Backups with Tape

Traditional backups to tape via a backup server

With limited tape resources and a variety of systems to protect, backup administrators needed to exert reasonably strong controls over what backed up when, and so in a number of organisations it was common to have database backups controlled within the backup product (e.g., NetWorker), with scheduling negotiated between the backup and database administrators. Where such processes have been established, they often continue – backups are, of course, a reasonably habitual process (and for good cause).

For some businesses though, DBAs might feel there was not enough control over the backup process – which might be agreed with based on the mission criticality of the applications running on top of the database, or because of the perceived licensing costs associated with using a plugin or module from the backup product to backup the database. So in these situations if a tape library or drives weren’t allocated directly to the database, the “dump and sweep” approach became quite common, viz.:

Dump and Sweep

Dump and Sweep

One of the most pervasive results of the “dump and sweep” methodology however is the amount of primary storage it uses. Due to it being much faster than tape, database administrators would often get significantly larger areas of storage – particularly as storage became cheaper – to conduct their dumps to. Instead of one or two days, it became increasingly common to have anywhere from 3-5 days of database dumps sitting on primary storage being swept up nightly by a filesystem backup agent.

Dump and sweep of course poses problems: in addition to needing large amounts of primary storage, the first backup for the database is on-platform – there’s no physical separation. That means the timing of getting the database backup completed before the filesystem sweep starts is critical. However, the timing for the dump is controlled by the DBA and dependent on the database load and the size of the database, whereas the timing of the filesystem backup is controlled by the backup administrator. This would see many environments spring up where over time the database grew to a size it wouldn’t get an off-platform backup for 24 hours – until the next filesystem backup happened. (E.g., a dump originally taking an hour to complete would be started at 19:00. The backup administrators would start the filesystem backup at 20:30, but over time the database backups would grow and wouldn’t complete until say, 21:00. Net result could be a partial or failed backup of the dump files the first night, with the second night being the first successful backup of the dump.)

Over time backup to disk entered popularity to overcome the overnight operational challenges of tape, then grew, and eventually the market has expanded to include deduplication storage, purpose built backup appliances and even when I’d normally consider to be integrated data protection appliances – ones where the intelligence (e.g., deduplication functionality) is extended out from the appliance to the individual systems being protected. That’s what we get, for instance, with Data Domain: the Boost functionality embedded in APIs on the client systems leveraging distributed segment processing to have everything being backed up participate in its own deduplication. The net result is one that scales better than the traditional 3-tier “client/server/{media server|storage node}” environment, because we’re scaling where it matters: out at the hosts being protected and up at protection storage, rather than adding a series of servers in the middle to manage bottlenecks. (I.e., we remove the bottlenecks.)

Even as large percentages of businesses switched to deduplicated storage – Data Domains mostly from a NetWorker perspective – and had the capability of leveraging distributed deduplication processes to speed up the backups, that legacy “dump and sweep” approach, if it had been in the business, often remained in the business.

We’re far enough into this now that I can revisit the two key schools of thought within data protection:

  • Backup administrators should schedule and control backups regardless of the application being backed up
  • Subject Matter Experts (SMEs) should have some control over their application backup process because they usually deeply understand how the business functions leveraging the application work

I’d suggest that the smaller the business, the more correct the first option is – or rather, when an environment is such that DBAs are contracted or outsourced in particular, having the backup administrator in charge of the backup process is probably more important to the business. But that creates a requirement for the backup administrator to know the ins and outs of backing up and recovering the application/database almost as deeply as a DBA themselves.

As businesses grow in size and as the number of mission critical systems sitting on top of databases/applications grow, there’s equally a strong opinion the second argument is correct: the SMEs need to be intimately involved in the backup and recovery process. Perhaps even more so, in a larger backup environment, you don’t want your backup administrators to actually be bottlenecks in a disaster situation (and they’d usually agree to this as well – it’s too stressful).

With centralised disk based protection storage – particularly deduplicating protection storage – we can actually get the best of both worlds now though. The backup administrators can be in control of the protection storage and set broad guidance on data protection at an architectural and policy level for much of the environment, but the DBAs can leverage that same protection storage and fold their backups into the overall requirements of their application. (This might be to even leverage third party job control systems to only trigger backups once batch jobs or data warehousing tasks have completed.)

Backup Process With Data Domain and Backup Server

Backup Process With Data Domain and Backup Server

That particular flow is great for businesses that have maintained centralised control over the backup process of databases and applications, but what about those where dump and sweep has been the design principle, and there’s a desire to keep a strong form of independence on the backup process, or where the overriding business goal is to absolutely limit the number of systems database administrators need to learn so they can focus on their job? They’re definitely legitimate approaches – particularly so in larger environments with more mission critical systems.

That’s why there’s the Data Domain Boost plugins for Applications and Databases – covering SAP, DB2, Oracle, SQL Server, etc. That gives a slightly different architecture, viz.:

DB Backups with Boost Plugin

DB Backups with Boost Plugin

In that model, the backup server (e.g., NetWorker) still controls and coordinates the majority of the backups in the environment, but the Boost Plugin for Databases/Applications is used on the database servers instead to allow complete integration between the DBA tools and the backup process.

So returning to the initial question – which way is right?

Well, that comes down to the real question: which way is right for your business? Pull any emotion or personal preferences out of the question and look at the real architectural requirements of the business, particularly relating to mission critical applications. Which way is the right way? Only your business can decide.

Here’s a thought I’ll leave you with though: there’s two critical components to being able to make the choice completely based on business requirements:

  • You need centralised protection storage where there aren’t the traditional (tape-inherited) limitations on concurrent device access
  • You need a data protection framework approach rather than a data protection monolith approach

The former allows you to make decisions without being impeded by arbitrary practical/physical limitations (e.g., “I can’t read from a tape and write to it at the same time”), and more importantly, the latter lets you build an adaptive data protection strategy using best of breed components at the different layers rather than squeezing everything into one box and making compromises at every step of the way. (NetWorker, as I’ve mentioned before, is a framework based backup product – but I’m talking more broadly here: framework based data protection environments.)

Happy choosing!

Basics: Recovering Data Backed up over NFS

$
0
0

Backing up data from an NFS mount-point is not ideal, but sometimes we don’t have a choice.

NFS Backup

There’s a few reasons you might end up in this situation – you might need to backup data on a particularly old system that no longer has a NetWorker client available (or perhaps never did), or you might need to backup a consumer-grade NAS that doesn’t support NDMP.

In this case, it’s the latter I’m doing having rejigged my home test lab. Having real data to test with is always good, and rather than using my filesystem generator tool I decided to backup my Synology NAS over NFS, with the fileshares directly mounted on the backup server. A backup is all well and good, but being able to recover the data is always important. While I’m not worried about ACLs/etc, I did want to know I was successfully backing up the data, so I ran a recovery test and was reminded of an old chestnut in how recoveries work.

[root@orilla Documents]# recover -s orilla
4181:recover: Path /synology/pmdg/Documents is within othalla:/volume1/pmdg
53362:recover: Cannot start session with server orilla: Client 'othalla.turbamentis.int' is not properly configured on the NetWorker Server or 'othalla.turbamentis.int'(if not a virtual host) is not in the aliases list for client 'orilla.turbamentis.int'.
88866:nsrd: Client 'othalla.turbamentis.int' is not properly configured on the NetWorker Server
or 'othalla.turbamentis.int'(if not a virtual host) is not in the aliases list for client 'orilla.turbamentis.int'.

Basically what the recovery error is saying that NetWorker has detected the path we’re sitting on/trying to recover from actually resides on a different host, and that host doesn’t appear to be a valid NetWorker client. Luckily, there’s a simple solution. (While the best solution might be a budget request with the home change board to buy a small Unity system, I’d just spent my remaining budget on home lab server upgrades, so I felt it best not to file that request.)

In this case the NFS mount was on the NetWorker server itself, so all I had to do was to tell NetWorker I wanted to recover from the NetWorker client:

root@orilla Documents]# recover -s orilla -c orilla
Current working directory is /synology/pmdg/Documents/
recover> add "Stop, Collaborate and Listen.pdf"
/synology/pmdg/Documents
1 file(s) marked for recovery
recover> relocate /tmp
recover> recover
Recovering 1 file from /synology/pmdg/Documents/ into /tmp
Volumes needed (all on-line):
  Backup.01 at Backup_01
Total estimated disk space needed for recover is 1532 KB.
Requesting 1 file(s), this may take a while...
Recover start time: Sun 08 May 2016 18:28:46 AEST
Requesting 1 recover session(s) from server.
129290:recover: Successfully established direct file retrieve session for save-set ID '2922310001' with adv_file volume 'Backup.01'.
./Stop, Collaborate and Listen.pdf
Received 1 file(s) from NSR server `orilla'
Recover completion time: Sun 08 May 2016 18:28:46 AEST
recover> quit

And that’s how simple the process is.

While ideally we shouldn’t be doing this sort of backup – a double network transfer is hardly bandwidth efficient, it’s always good to keep it in your repertoire just in case you need it.


Basics – Linux File Level Recovery from VMware Image Level Backups

$
0
0

NetWorker 9 introduced a new, pure HTML5 web interface for the File Level Recovery interface for VBA, which works much the same way as the v8.x FLR, just without Flash.

VBA FLR

However, it also introduced nsrvbaflr, a command line utility that comes with the base NetWorker client install, which can be used on Linux or Windows virtual machines to execute file level recovery from VMware image level backups.

Hang on, I hear you say – VMware image level backups are meant to be clientless, so does that mean I have to start installing the client software just for FLR? Well, actually – no.

A NetWorker Linux client install will include the nsrvbaflr utility in /usr/sbin, and this is a standalone binary. It doesn’t rely on any other binaries or libraries, so in order to use it on a Linux VMware instance, all you have to do is copy the binary across from a compatible client install. Since my NetWorker server (orilla) is a Linux host itself, that’s as simple as:

[Mon Jun 27 14:23:16]
[• ~ •]
pmdg@ganymede 
$ ssh root@orilla
root@orilla's password: <<password>>
Last login: Mon Jun 27 12:25:45 2016 from krynn.turbamentis.int
[root@orilla ~]# scp /usr/sbin/nsrvbaflr root@krell:/root
root@krell's password: 
nsrvbaflr                         100%         5655KB      5.5MB/s    00:00

With the binary copied across FLR is only a step away.

The nsrvbaflr utility can be run in interactive or non-interactive mode. I wanted to try it out in interactive mode, so the session started off like this:

[root@krell tmp]# nsrvbaflr
-bash: nsrvbaflr: command not found
[root@krell tmp]# /root/nsrvbaflr
VBA hostname|IP: archon.turbamentis.int
 Successfully connected to VBA: (archon.turbamentis.int)
vmware-flr> locallogin
 Username: root
 Password: <<password>>

I then had a bit of an exercise in debugging. You see, I’d finally rebuilt my home lab recently and part of that involved spinning up a whole bunch of individual virtual machines running CentOS 6.x to takeover functions previously collapsed to a single machine. So I’ve got independent Mail, Wiki and DNS/DHCP servers, and of course I accepted the defaults on most of those systems leaving me with ext4 filesystems, which the base VBA appliance can’t handle. This, of course, I’d forgotten. So of course, when I then tried out any command that would access the filesystem of a backup, I had this happen:

vmware-flr> cd root
. . . . . . . . . . . . . . . . . . . . . . . . . . . . . . . . . . . . . . . . . . . . . . . . . . . . . . . . . . . . . . . . . . . . . . . . . . . . . . . . . . . . . . . . . . . . . . . . . . . . . . . . . . . . . . . . . . . . . . . . . . . . . . . . . . . . . . . . 
 Backup browse request failed. Reason: (Unknown)
vmware-flr> pwd
 Backup working folder: Backup root
vmware-flr> ls
. . . . . . . . . . . . . . . . . . . . . . . . . . . . . . . . . . . . . . . . . . . . . . . . . . . . . . . . . . . . . . . . . . . . . . . . . . . . . . . . . . . . . . . . . . . . . . . . . . . . . . . . . . . . . . . . . . . . . . . . . . . . . . . . . . . . . . . . . . . . 
 Backup browse request failed. Reason: (Unknown)

After a little while wearing a thinking cap again, I remembered the ext4 limitation, so I quickly provisioned a VBA Proxy within my home lab. (If you review the documentation for NetWorker VMware Integration, this is fairly clearly spelt out. Dolt that I was, I forgot.) Once that proxy was deployed, things went a whole lot more smoothly:

[root@krell tmp]# /root/nsrvbaflr
VBA hostname|IP: archon.turbamentis.int
 Successfully connected to VBA: (archon.turbamentis.int)
vmware-flr> locallogin
 Username: root
 Password: <<password>>
 Successfully logged into client: (/caprica.turbamentis.int/VirtualMachines/krell)
vmware-flr> backups
 Backups for client: /caprica.turbamentis.int/VirtualMachines/krell
 Backup number: 54 Date: 2016/06/27 01:56 PM
 Backup number: 53 Date: 2016/06/27 02:00 AM
 Backup number: 52 Date: 2016/06/26 02:00 AM
 Backup number: 51 Date: 2016/06/25 02:01 AM
 Backup number: 50 Date: 2016/06/24 02:00 AM
 Backup number: 49 Date: 2016/06/23 02:01 AM
 Backup number: 48 Date: 2016/06/22 02:00 AM
 Backup number: 47 Date: 2016/06/21 02:01 AM
 Backup number: 46 Date: 2016/06/20 02:01 AM
 Backup number: 45 Date: 2016/06/19 02:01 AM
 Backup number: 44 Date: 2016/06/18 02:01 AM
 Backup number: 43 Date: 2016/06/17 02:01 AM
 Backup number: 42 Date: 2016/06/16 02:01 AM
 Backup number: 41 Date: 2016/06/15 02:01 AM
 Backup number: 40 Date: 2016/06/14 02:00 AM
 Backup number: 39 Date: 2016/06/13 02:01 AM
 Backup number: 38 Date: 2016/06/12 02:01 AM
 Backup number: 37 Date: 2016/06/11 02:01 AM
 Backup number: 36 Date: 2016/06/10 02:00 AM
 Backup number: 35 Date: 2016/06/09 02:01 AM
 Backup number: 34 Date: 2016/06/08 02:01 AM
 Backup number: 33 Date: 2016/06/07 02:01 AM
 Backup number: 32 Date: 2016/06/06 02:01 AM
 Backup number: 31 Date: 2016/06/05 02:01 AM
 Backup number: 30 Date: 2016/06/04 02:01 AM
 Backup number: 29 Date: 2016/06/03 02:01 AM
 Backup number: 28 Date: 2016/06/02 09:05 AM
 Backup number: 27 Date: 2016/06/02 02:01 AM
 Backup number: 26 Date: 2016/06/01 02:01 AM
 Backup number: 25 Date: 2016/05/31 02:01 AM
 Backup number: 24 Date: 2016/05/30 02:01 AM
 Backup number: 23 Date: 2016/05/29 02:01 AM
 Backup number: 22 Date: 2016/05/28 03:08 PM
 Backup number: 21 Date: 2016/05/28 02:00 AM
vmware-flr> backup 53
 Backup: (53) selected.
vmware-flr> cd root
. . . . . . . . . . . . . . . . . . 
vmware-flr> ls
 Folder: root
 Folder: .ssh 4 KB 2016/06/02 09:08 PM
 Folder: bin 4 KB 2016/06/07 11:09 PM
 File: .bash_history 4.9 KB 2016/07/20 07:58 AM
 File: .bash_logout 18 B 2009/06/20 10:45 AM
 File: .bash_profile 176 B 2009/06/20 10:45 AM
 File: .bashrc 176 B 2004/10/23 03:59 AM
 File: .cshrc 100 B 2004/10/23 03:59 AM
 File: .tcshrc 129 B 2005/01/03 09:42 PM
 File: anaconda-ks.cfg 1.5 KB 2016/06/02 08:25 PM
 File: install.log 26.7 KB 2016/06/02 08:25 PM
 File: install.log.syslog 7.4 KB 2016/06/02 08:24 PM

2 Folder(s)
 9 File(s)
vmware-flr> add install.log
 Path: (root/install.log) successfully added to the recover queue.
vmware-flr> targetpath
 Enter "." to set working folder: () as the target path or enter an absoulte path.
 path: tmp
 Target path successfully set to: (/tmp)
vmware-flr> queue
 Recover queue: root/install.log
vmware-flr> status
 VBA host:               archon.turbamentis.int
 VBA version:            1.5.0.159_7.2.60.20_2.5.0.719
 Local user:             root
 Source client FQN:      /caprica.turbamentis.int/VirtualMachines/krell
 Selected backup:        Backup #: 53 Date: 2016/06/27 02:00 AM
 Backup working folder:  /root
 Recover queue:          root/install.log
 Target client FQN:      /caprica.turbamentis.int/VirtualMachines/krell
 Target working folder:  Client root
 Target path:            /tmp
vmware-flr> recover
. 
 The restore request has been successfully issued to the VBA.
vmware-flr> quit
[root@krell tmp]# ls /tmp/install.log
/tmp/install.log

That’s how simple FLR is from VMware image level backups under NetWorker 9. The same limitations for FLR in terms of the number of files and folders, etc., apply to command line as much as they do the web interface, so keep that in mind when you’re using it. Beyond that, this makes it straight-forward to perform FLR for Linux hosts without needing to launch X11.

Backing up to Recover: PSS, BBB and VBA

$
0
0

I’ve recently been doing some testing around Block Based Backups, and specifically recoveries from them. This has acted as an excellent reminder of two things for me:

  • Microsoft killing Technet is a real PITA.
  • You backup to recover, not backup to backup.

The first is just a simple gripe: running up an eval Windows server every time I want to run a simple test is a real crimp in my style, but $1,000+ licenses for a home lab just can’t be justified. (A “hey this is for testing only and I’ll never run a production workload on it” license would be really sweet, Microsoft.)

The second is the real point of the article: you don’t backup for fun. (Unless you’re me.)

iStock Racing

You ultimately backup to be able to get your data back, and that means deciding your backup profile based on your RTOs (recovery time objectives), RPOs (recovery time objectives) and compliance requirements. As a general rule of thumb, this means you should design your backup strategy to meet at least 90% of your recovery requirements as efficiently as possible.

For many organisations this means backup requirements can come down to something like the following: “All daily/weekly backups are retained for 5 weeks, and are accessible from online protection storage”. That’s why a lot of smaller businesses in particular get Data Domains sized for say, 5-6 weeks of daily/weekly backups and 2-3 monthly backups before moving data off to colder storage.

But while online is online is online, we have to think of local requirements, SLAs and flow-on changes for LTR/Compliance retention when we design backups.

This is something we can consider with things even as basic as the humble filesystem backup. These days there’s all sorts of things that can be done to improve the performance of dense filesystem (and dense-like) filesystem backups – by dense I’m referring to very large numbers of files in relatively small storage spaces. That’s regardless of whether it’s in local knots on the filesystem (e.g., a few directories that are massively oversubscribed in terms of file counts), or whether it’s just a big, big filesystem in terms of file count.

We usually think of dense filesystems in terms of the impact on backups – and this is not a NetWorker problem; this is an architectural problem that operating system vendors have not solved. Filesystems struggle to scale their operational performance for sequential walking of directory structures when the number of files starts exponentially increasing. (Case in point: Cloud storage is efficiently accessed at scale when it’s accessed via object storage, not file storage.)

So there’s a number of techniques that can be used to speed up filesystem backups. Let’s consider the three most readily available ones now (in terms of being built into NetWorker):

  • PSS (Parallel Save Streams) – Dynamically builds multiple concurrent sub-savestreams for individual savesets, speeding up the backup process by having multiple walking/transfer processes.
  • BBB (Block Based Backup) – Bypasses the filesystem entirely, performing a backup at the block level of a volume.
  • Image Based Backup – For virtual machines, a VBA based image level backup reads the entire virtual machine at the ESX/storage layer, bypassing the filesystem and the actual OS itself.

So which one do you use? The answer is a simple one: it depends.

It depends on how you need to recover, how frequently you might need to recover, what your recovery requirements are from longer term retention, and so on.

For virtual machines, VBA is usually the method of choice as it’s the most efficient backup method you can get, with very little impact on the ESX environment. It can recover a sufficient number of files in a single session for most use requirements – particularly if file services have been pushed (where they should be) into dedicated systems like NAS appliances. You can do all sorts of useful things with VBA backups – image level recovery, changed block tracking recovery (very high speed in-place image level recovery), instant access (when using a Data Domain), and of course file level recovery. But if your intent is to recover tens of thousands of files in a single go, VBA is not really what you want to use.

It’s the recovery that matters.

For compatible operating systems and volume management systems, Block Based Backups work regardless of whether you’re in a virtual machine or whether you’re on a physical machine. If you’re needing to backup a dense filesystem running on Windows or Linux that’s less than ~63TB, BBB could be a good, high speed method of achieving that backup. Equally, BBB can be used to recover large numbers of files in a single go, since you just mount the image and copy the data back. (I recently did a test where I dropped ~222,000 x 511 byte text files into a single directory on Windows 2008 R2 and copied them back from BBB without skipping a beat.)

BBB backups aren’t readily searchable though – there’s no client file index constructed. They work well for systems where content is of a relatively known quantity and users aren’t going to be asking for those “hey I lost this file somewhere in the last 3 weeks and I don’t know where I saved it” recoveries. It’s great for filesystems where it’s OK to mount and browse the backup, or where there’s known storage patterns for data.

It’s the recovery that matters.

PSS is fast, but in any smack-down test BBB and VBA backups will beat it for backup speed. So why would you use them? For a start, they’re available on a wider range of platforms – VBA requires ESX virtualised backups, BBB requires Windows or Linux and ~63TB or smaller filesystems, PSS will pretty much work on everything other than OpenVMS – and its recovery options work with any protection storage as well. Both BBB and VBA are optimised for online protection storage and being able to mount the backup. PSS is an extension of the classic filesystem agent and is less specific.

It’s the recovery that matters.

So let’s revisit that earlier question: which one do you use? The answer remains: it depends. You pick your backup model not on the basis of “one size fits all” (a flawed approach always in data protection), but your requirements around questions like:

  • How long will the backups be kept online for?
  • Where are you storing longer term backups? Online, offline, nearline or via cloud bursting?
  • Do you have more flexible SLAs for recovery from Compliance/LTR backups vs Operational/BAU backups? (Usually the answer will be yes, of course.)
  • What’s the required recovery model for the system you’re protecting? (You should be able to form broad groupings here based on system type/function.)
  • Do you have any externally imposed requirements (security, contractual, etc.) that may impact your recovery requirements?

Remember there may be multiple answers. Image level backups like BBB and VBA may be highly appropriate for operational recoveries, but for long term compliance your business may have needs that trigger filesystem/PSS backups for those monthlies and yearlies. (Effectively that comes down to making the LTR backups as robust in terms of future infrastructure changes as possible.) That sort of flexibility of choice is vital for enterprise data protection.

One final note: the choices, once made, shouldn’t stay rigidly inflexible. As a backup administrator or data protection architect, your role is to constantly re-evaluate changes in the technology you’re using to see how and where they might offer improvements to existing processes. (When it comes to release notes: constant vigilance!)

Backing up Oracle with NMDA

$
0
0

In previous posts I’ve talked about options around database backups – specifically whether you’d use a NetWorker module or say, DDBoost for Enterprise Applications. There’s a lot of architectural positives towards having the database administrators in control of the backup, but sometimes you’ll want the backups to be controlled and coordinated by NetWorker. It could be your organisation doesn’t have DBAs on-staff and need backup administrators to have more hands-on control over the environment, or it could be you have a policy to fully integrate database backup and recovery operations within NetWorker.

I’ve been going through a re-setup of my lab environment recently and today I wanted to spend a bit of time outlining how easy it is with NetWorker 9 (and NMDA v9) to configure Oracle backups, perform them, and do the recoveries as well – particularly if you’re a backup admin rather than a database admin.

With a freshly installed Oracle 12 instance on CentOS 6.7, I went through the process of installing and configuring NetWorker backups.

First you need to install the base NetWorker client package. (I always install the Extended client package for my lab servers, unless I’m specifically testing otherwise.) Once that’s been installed, you can install the appropriate NMDA package:

01 NMDA Plugin Install

01 NMDA Plugin Install

You’ll note at the end of the installation it tells you there may be additional postinstall steps to perform. I forgot to do that which generated an “oops” moment later – I’ll get to that at the appropriate time. But yes, there is a post-install operation you need to perform with Oracle databases.

Anyway, with the plugin installed and NetWorker started on the client, I jumped over to NMC to configure database backups for this system using the wizard:

02 New Client Wizard 01

02 New Client Wizard 01

Just choose “New Client Wizard” to start a step-by-step configuration process for Oracle backups for the newly installed system. The first thing you’re prompted for of course is the host name and what type of backup you’re intending to configure.

03 New Client Wizard 02

03 New Client Wizard 02

Hitting next, you’ll have NetWorker interrogate the client software to determine what backup modules and options are available and you’ll get to pick what you want to do:

04 New Client Wizard 03

04 New Client Wizard 03

And yes, it really is that simple – just select Oracle and hit Next.

05 New Client Wizard 04

05 New Client Wizard 04

The above part of the wizard covers the absolute basics about the configuration, and unless you’re planning on backing up the database over DDBoost-FC, you’ll be fine to leave the options as they are. Click Next to continue.

06 New Client Wizard 05

06 New Client Wizard 05

Here you get to choose between the three different backup options – a normal scheduled backup, a custom scheduled backup or a scheduled backup of disk backups – effectively allowing you to sweep up RMAN backups executed by the DBAs. In this case I wanted to go with the basics and kept it on Typical scheduled backup. Next to continue.

07 New Client Wizard 06

07 New Client Wizard 06

It’s on this form that you’ll definitely need a bit of an understanding of the Oracle setup. NetWorker managed to extract the Oracle home directory (presumably by interrogating /etc/oratab), but it needed me to specify the path to the tnsnames.ora directory. (That’s going to depend on your install of Oracle of course.)

The wizard uses two different forms of authentication – OS authentication or database authentication. Because I’d just setup the database in a pretty basic way I went with OS level authentication. (The alternative is to ensure there’s a fully configured backup user within the database and to use the database authentication. This is actually the more appropriate way if you have DBAs on staff. If you’re working on your own you might want to stick with the more basic OS authentication.)

So I supplied the username for Oracle (remember the base NetWorker client software runs as root/administrator, so it can su to the appropriate account), and the SID for the database instance I was configuring backups for. Next.

08 New Client Wizard 07

08 New Client Wizard 07

You then get confirmation of the options that are going to be configured and the choice between going back, cancelling the wizard or creating the client instance. I clicked Create. At the end of the creation you’ll get information as to whether it was done successfully or not.

Next up, it was necessary to create a new workflow for Oracle backups. I went to an Adhoc policy I have defined for backups I don’t automatically run each day in my lab, and started the creation of a new workflow. The first dialog is as follows:

09 New Workflow 01

09 New Workflow 01

This gives you the core details of the workflow – workflow name, when it executes, whether it automatically executes, etc. Name it how you need to, configure a Group consisting of the Oracle client(s) database backup instances, and then click Add to add the backup action.

10 New Workflow 02

10 New Workflow 02

Because this is a small database I elected to make every backup a full. If you talk to most DBAs you’ll find there’s a tradeoff between the space savings on incremental backups and the change of procedures for recoveries. (While most of those procedural changes are mitigated by backing up to disk, it’s quite common to have specific breakpoints in most environments between database backups that are full every day and those that get an extended fulls+incrementals configuration.)

With the levels/schedule set, I hit Next to move onto the next page of the dialog:

11 New Workflow 03

11 New Workflow 03

It’s on this dialog you’ll choose what storage node will handle the backup, how long it will be retained for, and most importantly, what pool is will be sent to. I wanted mine to go to my DDVE system, so I switched the pool over from Default to one I’d created called BoostBackup.

Moving on by clicking Next:

12 New Workflow 04

12 New Workflow 04

On the above dialog form you’ll get to define some more granular details about the backup process – how notifications are handled, number of retries, and overrides. I didn’t need to change anything here for what I was setting up, so I clicked Next to continue through the wizard to the Summary form.

13 New Workflow 05

13 New Workflow 05

The summary of the new action was pretty much what I was expecting so it was time to Configure.

14 New Workflow 06

14 New Workflow 06

With the action successfully created I could click OK to finish working on the Workflow and jump across to the Monitoring tab to start the new workflow:

15 Start Workflow

15 Start Workflow

Right clicking the workflow and choosing Start will have you prompted for confirmation that you do want the job run now; once you’ve given that confirmation your backup should kick off.

Except! Remember that bit where I said I was a bit of a doofus and didn’t do the post-install configuration step? Well, I forgot to link the NetWorker module library to Oracle’s libobk.so file, meaning the job failed. Since however NetWorker saves the output of RMAN it was pretty easy to jump into the policy logs and see exactly what went wrong, viz.:

17 Oops My Mistake

17 Oops My Mistake

That RMAN/Oracle error code and text tells the whole story there – unable to allocate a backup channel because there’s no linkage to an SBT_TAPE device type. (Remember with Oracle any external plugin: NetWorker, Avamar, DDBEA, NetBackup, etc. all slot in using Oracle’s SBT_TAPE device type. A legacy name from how we used to backup.)

With that corrected by creating the appropriate symlink (which is of course completely documented in the NMDA install guide that I didn’t check!), the backup ran to completion, quickly:

18 Successful Backup

18 Successful Backup

Now a backup is one thing, but recoveries are the real crux of the matter! And Oracle recoveries can be completely performed within NMC these days using the NMC Recovery interface. While your DBAs might want to run the recovery from the Oracle server if they’re available, empowering backup administrators to craft recovery processes when there are no DBAs available is just as useful.

Warning: I’m working through an example recovery scenario. You should not follow this blindly if you’re using it in your environment. This is a lab test only. Always adapt your recovery process to the activities and recovery requirements at hand, and always work with the appropriate documentation, processes and know-how!

19 NMC Recovery 01

19 NMC Recovery 01

The first step is to choose the host you want to recover (in my case, dbase1), and choose the type of recovery you want to configure (Oracle). Hit Next to continue.

20 NMC Recovery 02

20 NMC Recovery 02

Your options are pretty straight forward here – recover to a duplicate database instance, or recover to the original database. I chose to do an original database recovery and clicked Next.

21 NMC Recovery 03

21 NMC Recovery 03

This dialog is pretty similar to that backup configuration dialog I showed earlier – provide the appropriate configuration details for the database and the authentication method required.

22 NMC Recovery 04

22 NMC Recovery 04

You get an option between just recovering specified archived redo log files, or the entire database/specific database elements. I was doing a full recovery so I kept with the default selection and clicked Next.

23 NMC Recovery 05

23 NMC Recovery 05

Here you get to choose what specific tablespaces/data files you want to recover. This is particularly handy if you’ve say, had a single tablespace accidentally deleted and just need to recover that. Again, I wanted to recover everything so I clicked Next to continue.

24 NMC Recovery 06

24 NMC Recovery 06

Unless you’re working with a DBA who says otherwise, or have already got the database in a startup/mount mode, you’ll likely want to click Yes here to have NetWorker handle that for you.

25 NMC Recovery 07

25 NMC Recovery 07

Here I got the choice to recover datafiles to alternate locations; I left them as-is and clicked Next.

26 NMC Recovery 08

26 NMC Recovery 08

Here’s where you choose how many channels you want to use for the recovery, when you want to recover to, and whether you want the database automatically started at the end of the recovery process.

Once you’ve worked through those options, NMC will show you the RMAN recovery script it’s created, and give you the option to edit it:

27 NMC Recovery 09

27 NMC Recovery 09

(You can even save a copy of the RMAN script in case you want to reference it later, or hand it over to the DBA to complete.)

Clicking Next, you’re invited to confirm storage node details and optionally change the volumes to be used for the recovery:

28 NMC Recovery 10

28 NMC Recovery 10

Once you click past here you can give the recovery a name and choose to start it:

29 NMC Recovery 11

29 NMC Recovery 11

As soon as you click “Run Recovery” the recovery process will start. Here’s a few dialogs showing output during the recovery process:

30 NMC Recovery 12

30 NMC Recovery 12

31 NMC Recovery 13

31 NMC Recovery 13

And the completed recovery:

32 NMC Recovery 14

32 NMC Recovery 14

There you have it. A complete Oracle configuration, backup and recovery.

(As I said before, that’s a lab recovery – if you’re actually doing a recovery while the steps may be the same, you still need to customise for your database, so make sure you perform any recovery as appropriate for your environment and circumstances.)

Overall though it’s fair to say that Oracle backup and recovery with NetWorker is simple and straight-forward.

GitLab’s RCA Misses Key Failures

$
0
0

On January 31, GitLab suffered a significant issue resulting in a data loss situation. In their own words, the replica of their production database was deleted, the production database was then accidentally deleted, then it turned out their backups hadn’t run. They got systems back with snapshots, but not without permanently losing some data. This in itself is an excellent example of the need for multiple data protection strategies; your data protection should not represent a single point of failure within the business, so having layered approaches to achieve a variety of retention times, RPOs, RTOs and the potential for cascading failures is always critical.

To their credit, they’ve published a comprehensive postmortem of the issue and Root Cause Analysis (RCA) of the entire issue (here), and must be applauded for being so open with everything that went wrong – as well as the steps they’re taking to avoid it happening again.

Server on Fire

But I do think some of the statements in the postmortem and RCA require a little more analysis, as they’re indicative of some of the challenges that take place in data protection.

I’m not going to speak to the scenario that led to the production, rather than replica database, being deleted. This falls into the category of “ooh crap” system administration mistakes that sadly, many of us will make in our careers. As the saying goes: accidents happen. (I have literally been in the situation of accidentally deleting a production database rather than its replica, and I can well and truly sympathise with any system or application administrator making that mistake.)

Within GitLab’s RCA under “Problem 2: restoring GitLab.com took over 18 hours”, several statements were made that irk me as a long-term data protection specialist:

Why could we not use the standard backup procedure? – The standard backup procedure uses pg_dump to perform a logical backup of the database. This procedure failed silently because it was using PostgreSQL 9.2, while GitLab.com runs on PostgreSQL 9.6.

As evidenced by a later statement (see the next RCA statement below), the procedure did not fail silently; instead, GitLab chose to filter the output of the backup process in a way that they did not monitor. There is, quite simply, a significant difference between fail silently and silently ignored results. The latter is a far more accurate statement than the former. A command that fails silently is one that exits with no error condition or alert. Instead:

Why did the backup procedure fail silently? – Notifications were sent upon failure, but because of the Emails being rejected there was no indication of failure. The sender was an automated process with no other means to report any errors.

The pg_dump command didn’t fail silently, as previously asserted. It generated output which was silently ignored due to a system configuration error. Yes, a system failed to accept the emails, and a system therefore failed to send the emails, but at the end of the day, a human failed to see or otherwise check as to why the backup reports were not being received. This is actually a critical reason why we need zero error policies – in data protection, no error should be allowed to continue without investigation and rectification, and a change in or lack of reporting or monitoring data for data protection activities must be treated as an error for investigation.

Why were Azure disk snapshots not enabled? – We assumed our other backup procedures were sufficient. Furthermore, restoring these snapshots can take days.

Simple lesson: If you’re going to assume something in data protection, assume it’s not working, not that it is.

Why was the backup procedure not tested on a regular basis? – Because there was no ownership, as a result nobody was responsible for testing the procedure.

There are two sections of the answer that should serve as a dire warning: “there was no ownership”, “nobody was responsible”. This is a mistake many businesses make, but I don’t for a second believe there was no ownership. Instead, there was a failure to understand ownership. Looking at the “Team | GitLab” page, I see:

  • Dmitriy Zaporozhets, “Co-founder, Chief Technical Officer (CTO)”
    • From a technical perspective the buck stops with the CTO. The CTO does own the data protection status for the business from an IT perspective.
  • Sid Sijbrandij, “Co-founder, Chief Executive Officer (CEO)”
    • From a business perspective, the buck stops with the CEO. The CEO does own the data protection status for the business from an operational perspective, and from having the CTO reporting directly up.
  • Bruce Armstrong and Villi Iltchev, “Board of Directors”
    • The Board of Directors is responsible for ensuring the business is running legally, safely and financially securely. They indirectly own all procedures and processes within the business.
  • Stan Hu, “VP of Engineering”
    • Vice-President of Engineering, reporting to the CEO. If the CTO sets the technical direction of the company, an engineering or infrastructure leader is responsible for making sure the company’s IT works correctly. That includes data protection functions.
  • Pablo Carranza, “Production Lead”
    • Reporting to the Infrastructure Director (a position currently open). Data protection is a production function.
  • Infrastructure Director:
    • Currently assigned to Sid (see above), as an open position, the infrastructure director is another link in the chain of responsibility and ownership for data protection functions.

I’m not calling these people out to shame them, or rub salt into their wounds – mistakes happen. But I am suggesting GitLab has abnegated its collective responsibility by simply suggesting “there was no ownership”, when in fact, as evidenced by their “Team” page, there was. In fact, there was plenty of ownership, but it was clearly not appropriately understood along the technical lines of the business, and indeed right up into the senior operational lines of the business.

You don’t get to say that no-one owned the data protection functions. Only that no-one understood they owned the data protection functions. One day we might stop having these discussions. But clearly not today.


What to do on world backup day

$
0
0

World backup day is approaching. (A few years ago now, someone came up with the idea of designating one day of the year to recognise backups.) Funnily enough, I’m not a fan of world backup day, simply because we don’t backup for the sake of backing up, we backup to recover.

Every day should, in fact, be world backup day.

Something that isn’t done enough – isn’t celebrated enough, isn’t tested enough – are recoveries. For many organisations, recovery tests consist of actually doing a recovery when requested, and things like long term retention backups are never tested, and even more rarely recovered from.

bigStock Rescue

So this Friday, March 31, I’d like to suggest you don’t treat as World Backup Day, but World Recovery Test Day. Use the opportunity to run a recovery test within your organisation (following proper processes, of course!) – preferably a recovery that you don’t normally run in terms of day to day operations. People only request file recoveries? Sounds like a good reason to run an Exchange, SQL or Oracle recovery to me. Most recoveries are Exchange mail level recoveries? Excellent, you know they work, let’s run a recovery of a complete filesystem somewhere.

All your recoveries are done within a 30 day period of the backup being taken? That sounds like an excellent idea to do the recovery from an LTR backup written 2+ years ago, too.

Part of running a data protection environment is having routine tests to validate ongoing successful operations, and be able to confidently report back to the business that everything is OK. There’s another, personal and selfish aspect to it, too. It’s one I learnt more than a decade ago when I was still an on-call system administrator: having well-tested recoveries means that you can sleep easily at night, knowing that if the pager or mobile phone does shriek you into blurry-eyed wakefulness at 1am, you can in fact log onto the required server and run the recovery without an issue.

So this World Backup Day, do a recovery test.


The need to have an efficient and effective testing system is something I cover in more detail in Data Protection: Ensuring Data Availability. If you want to know more, feel free to check out the book on Amazon or CRC Press. Remember that it doesn’t matter how good the technology you deploy is if you don’t have the processes and training to use it.

Viewing all 60 articles
Browse latest View live


Latest Images